License Registration and Editing
Menu → Licenses
In this article, you will have access to information on:
To To view, register, or edit a film or series Licensego to the Licenses in the page in the Main MenuYou will see the main page with the Licenses already registered:
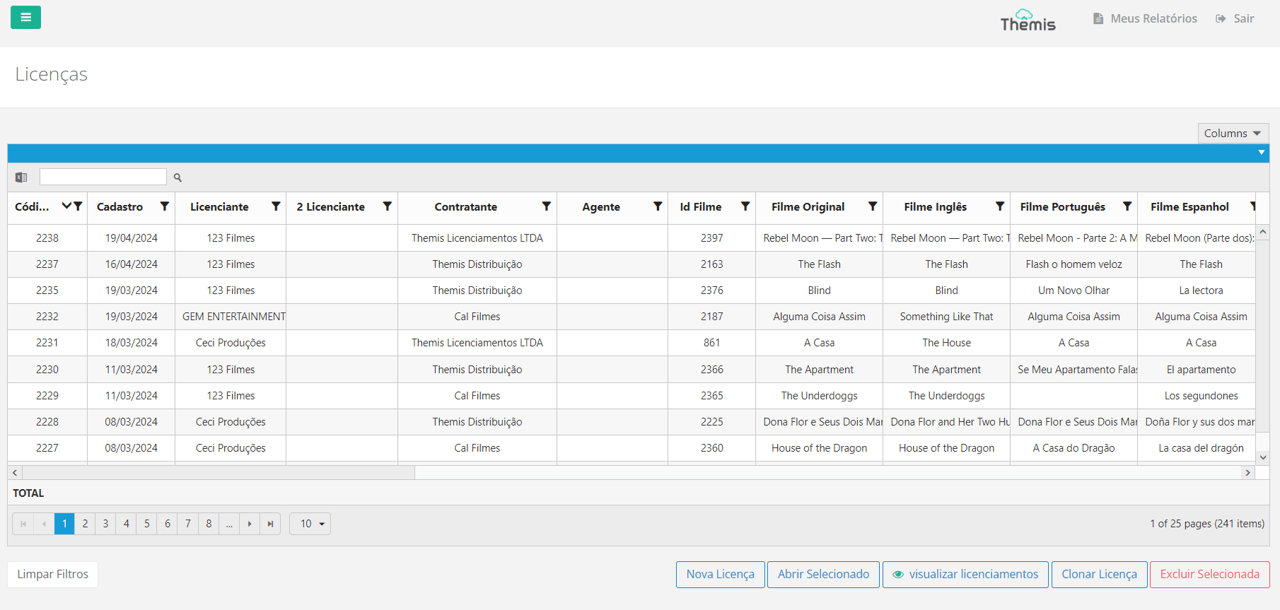
Consulting Licenses for Films and Series
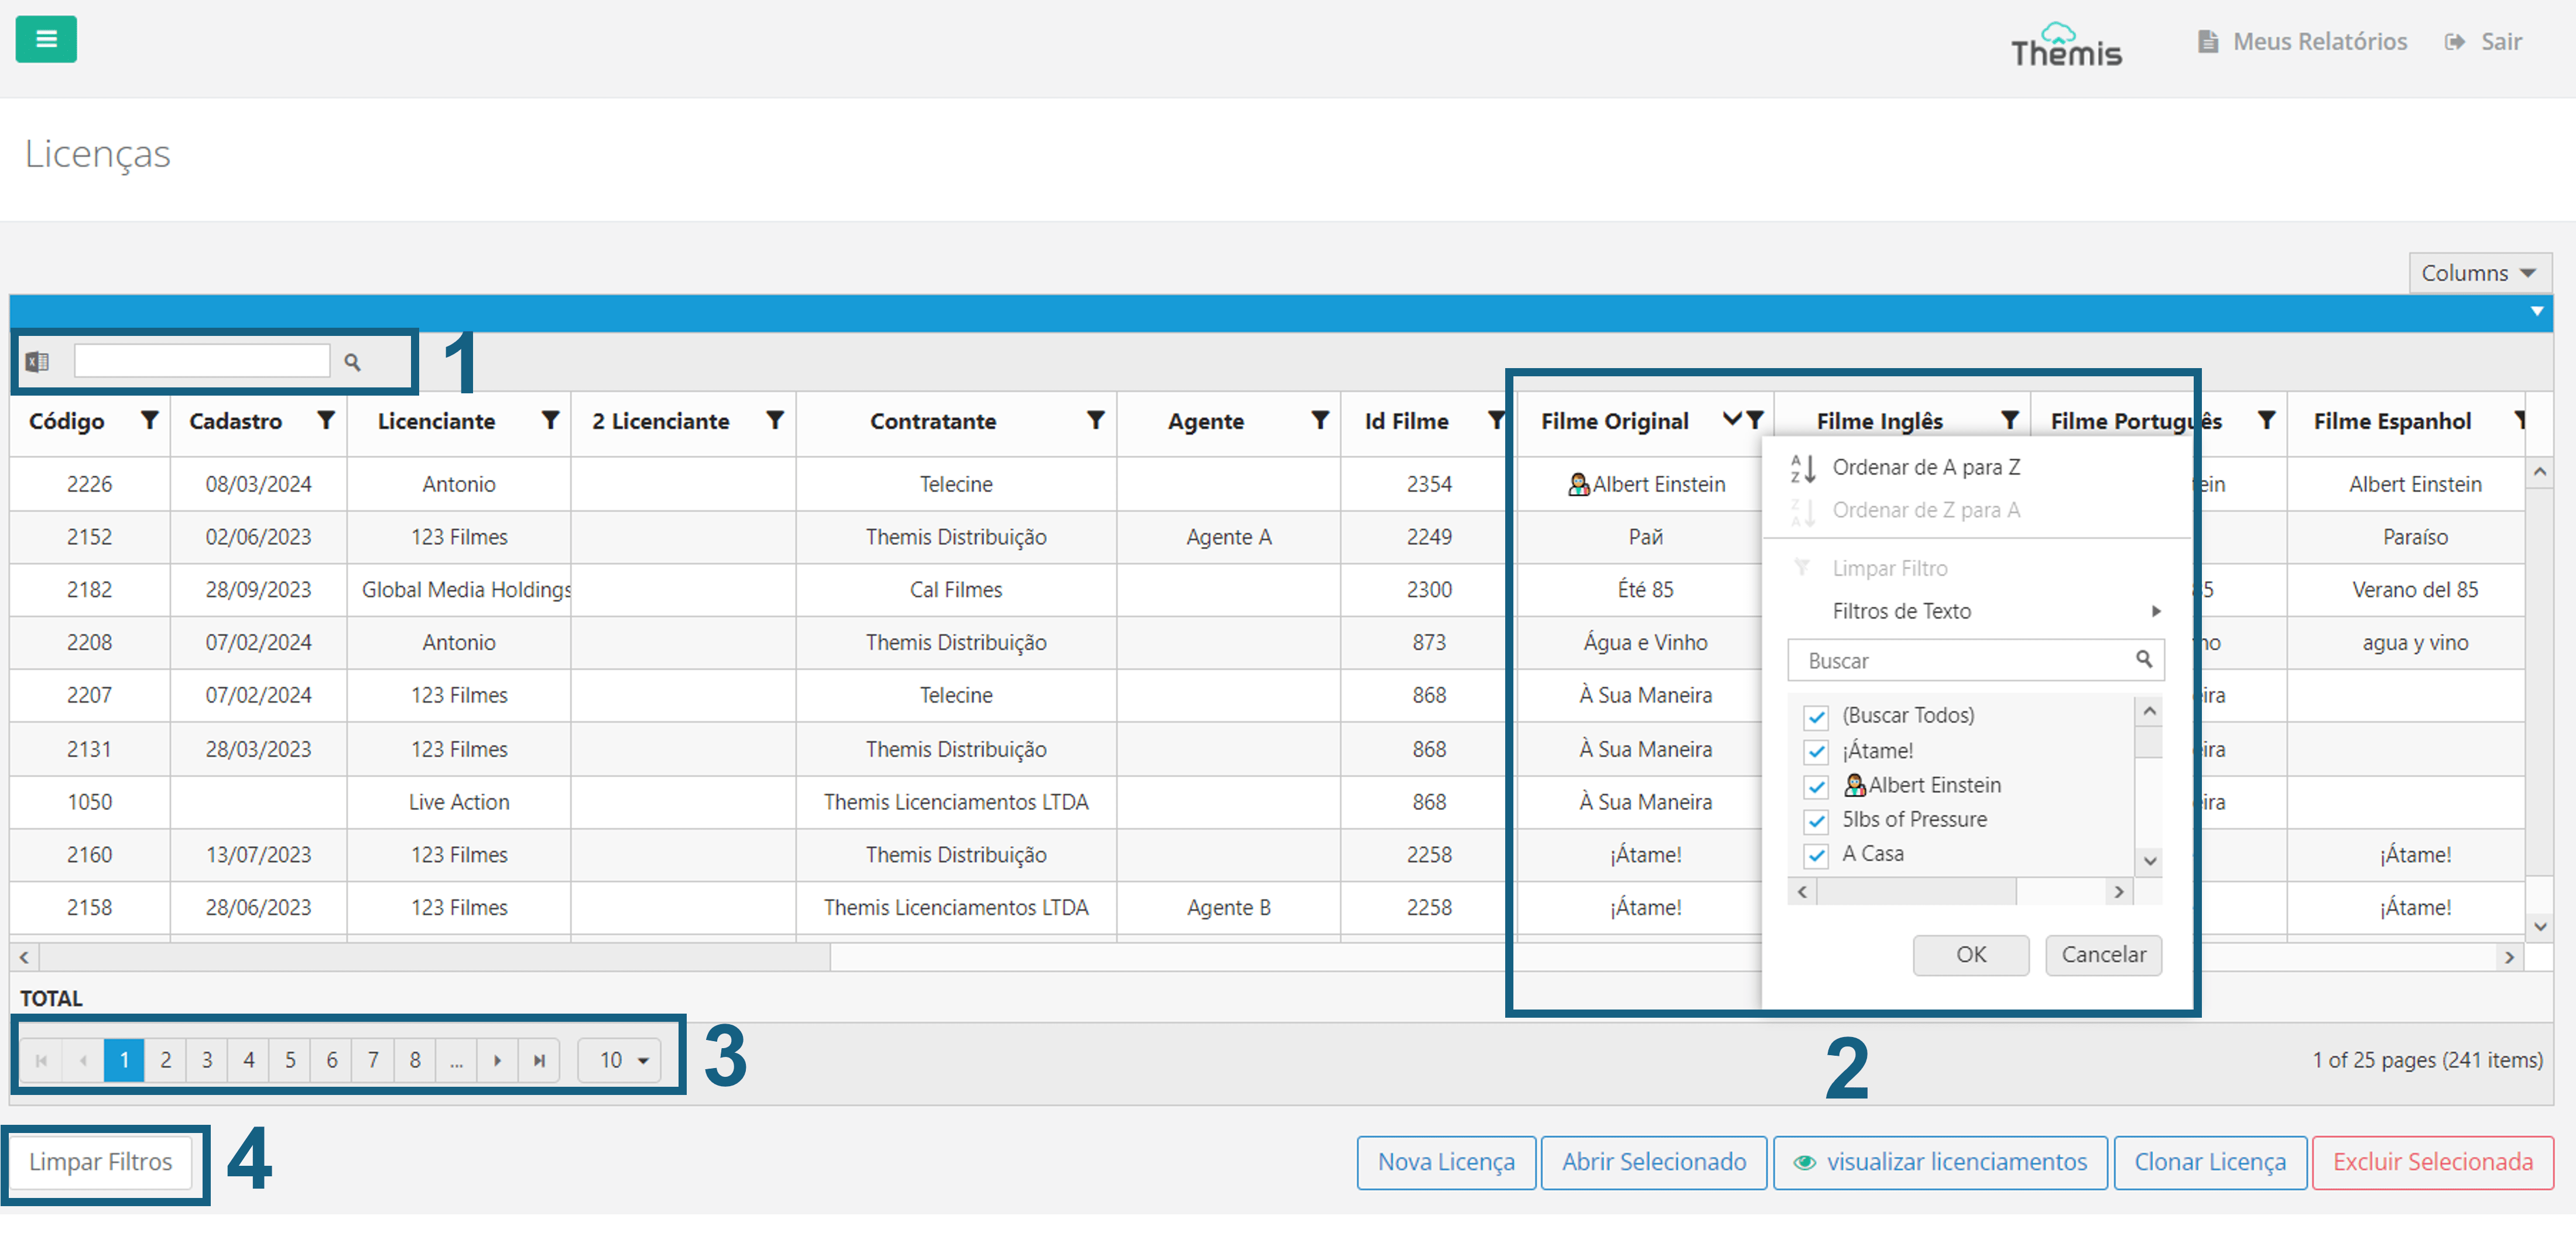
1. To consult a specific: License, you can use the following resources:
2. Column Filter: In each column, click the "filter" icon to order, select, or search for an item.
Page Menu: Navigate through the title pages.
Clear Filters: Clear all applied filters at once.
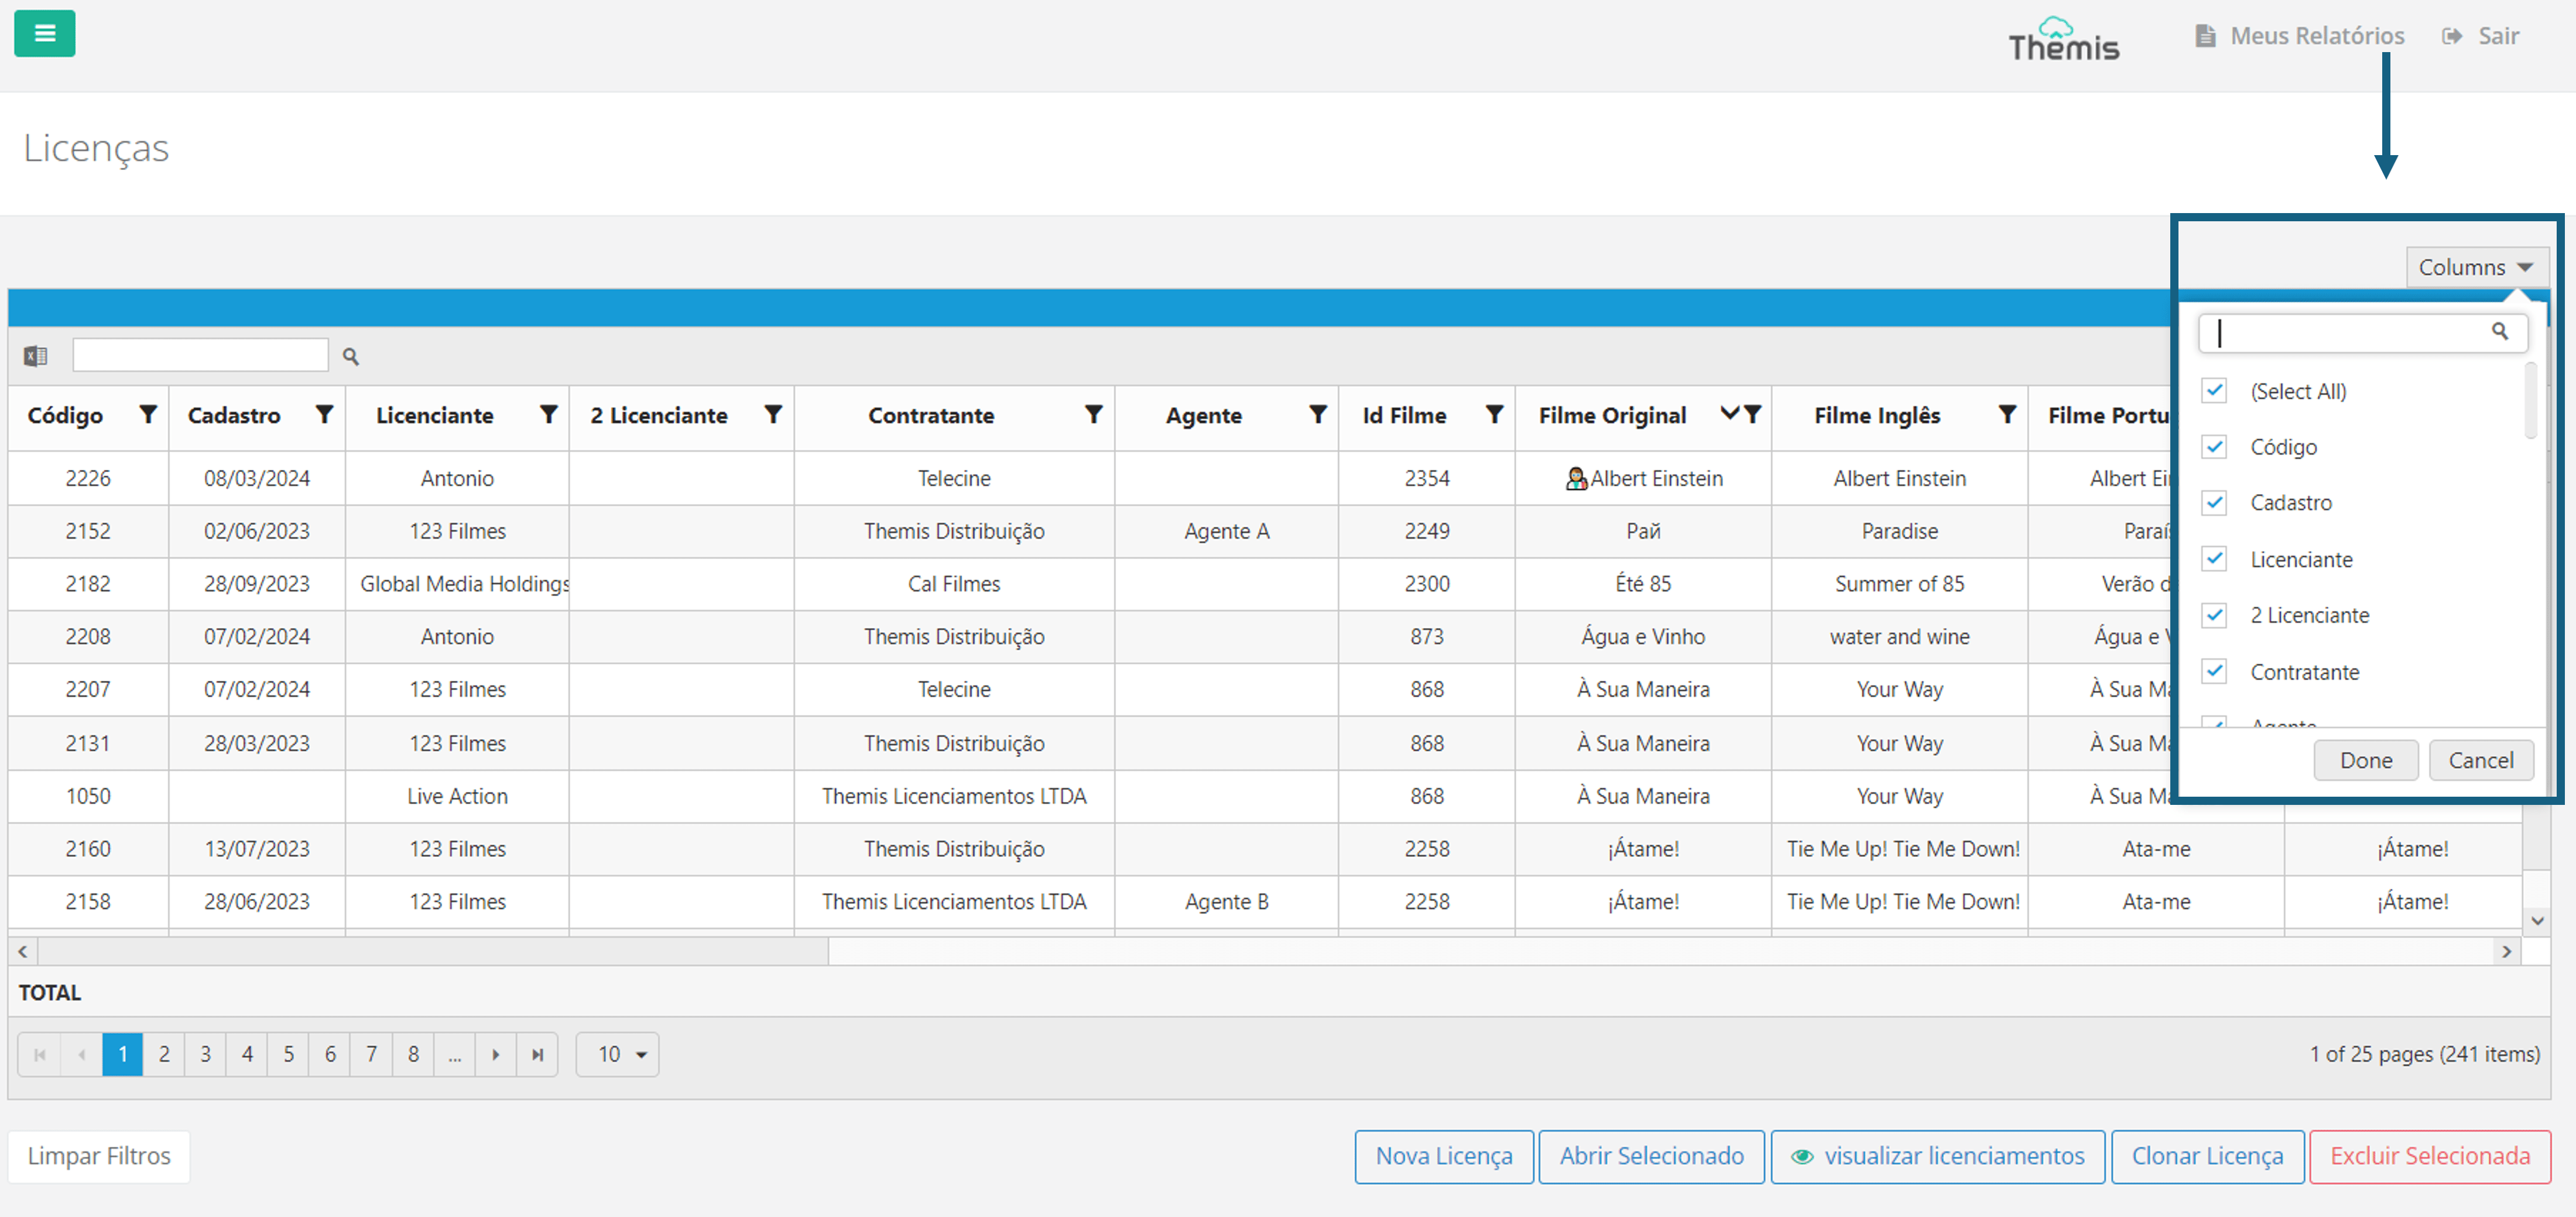
You can also select which columns to view through the **Columns** menu located at the top right corner of the page:
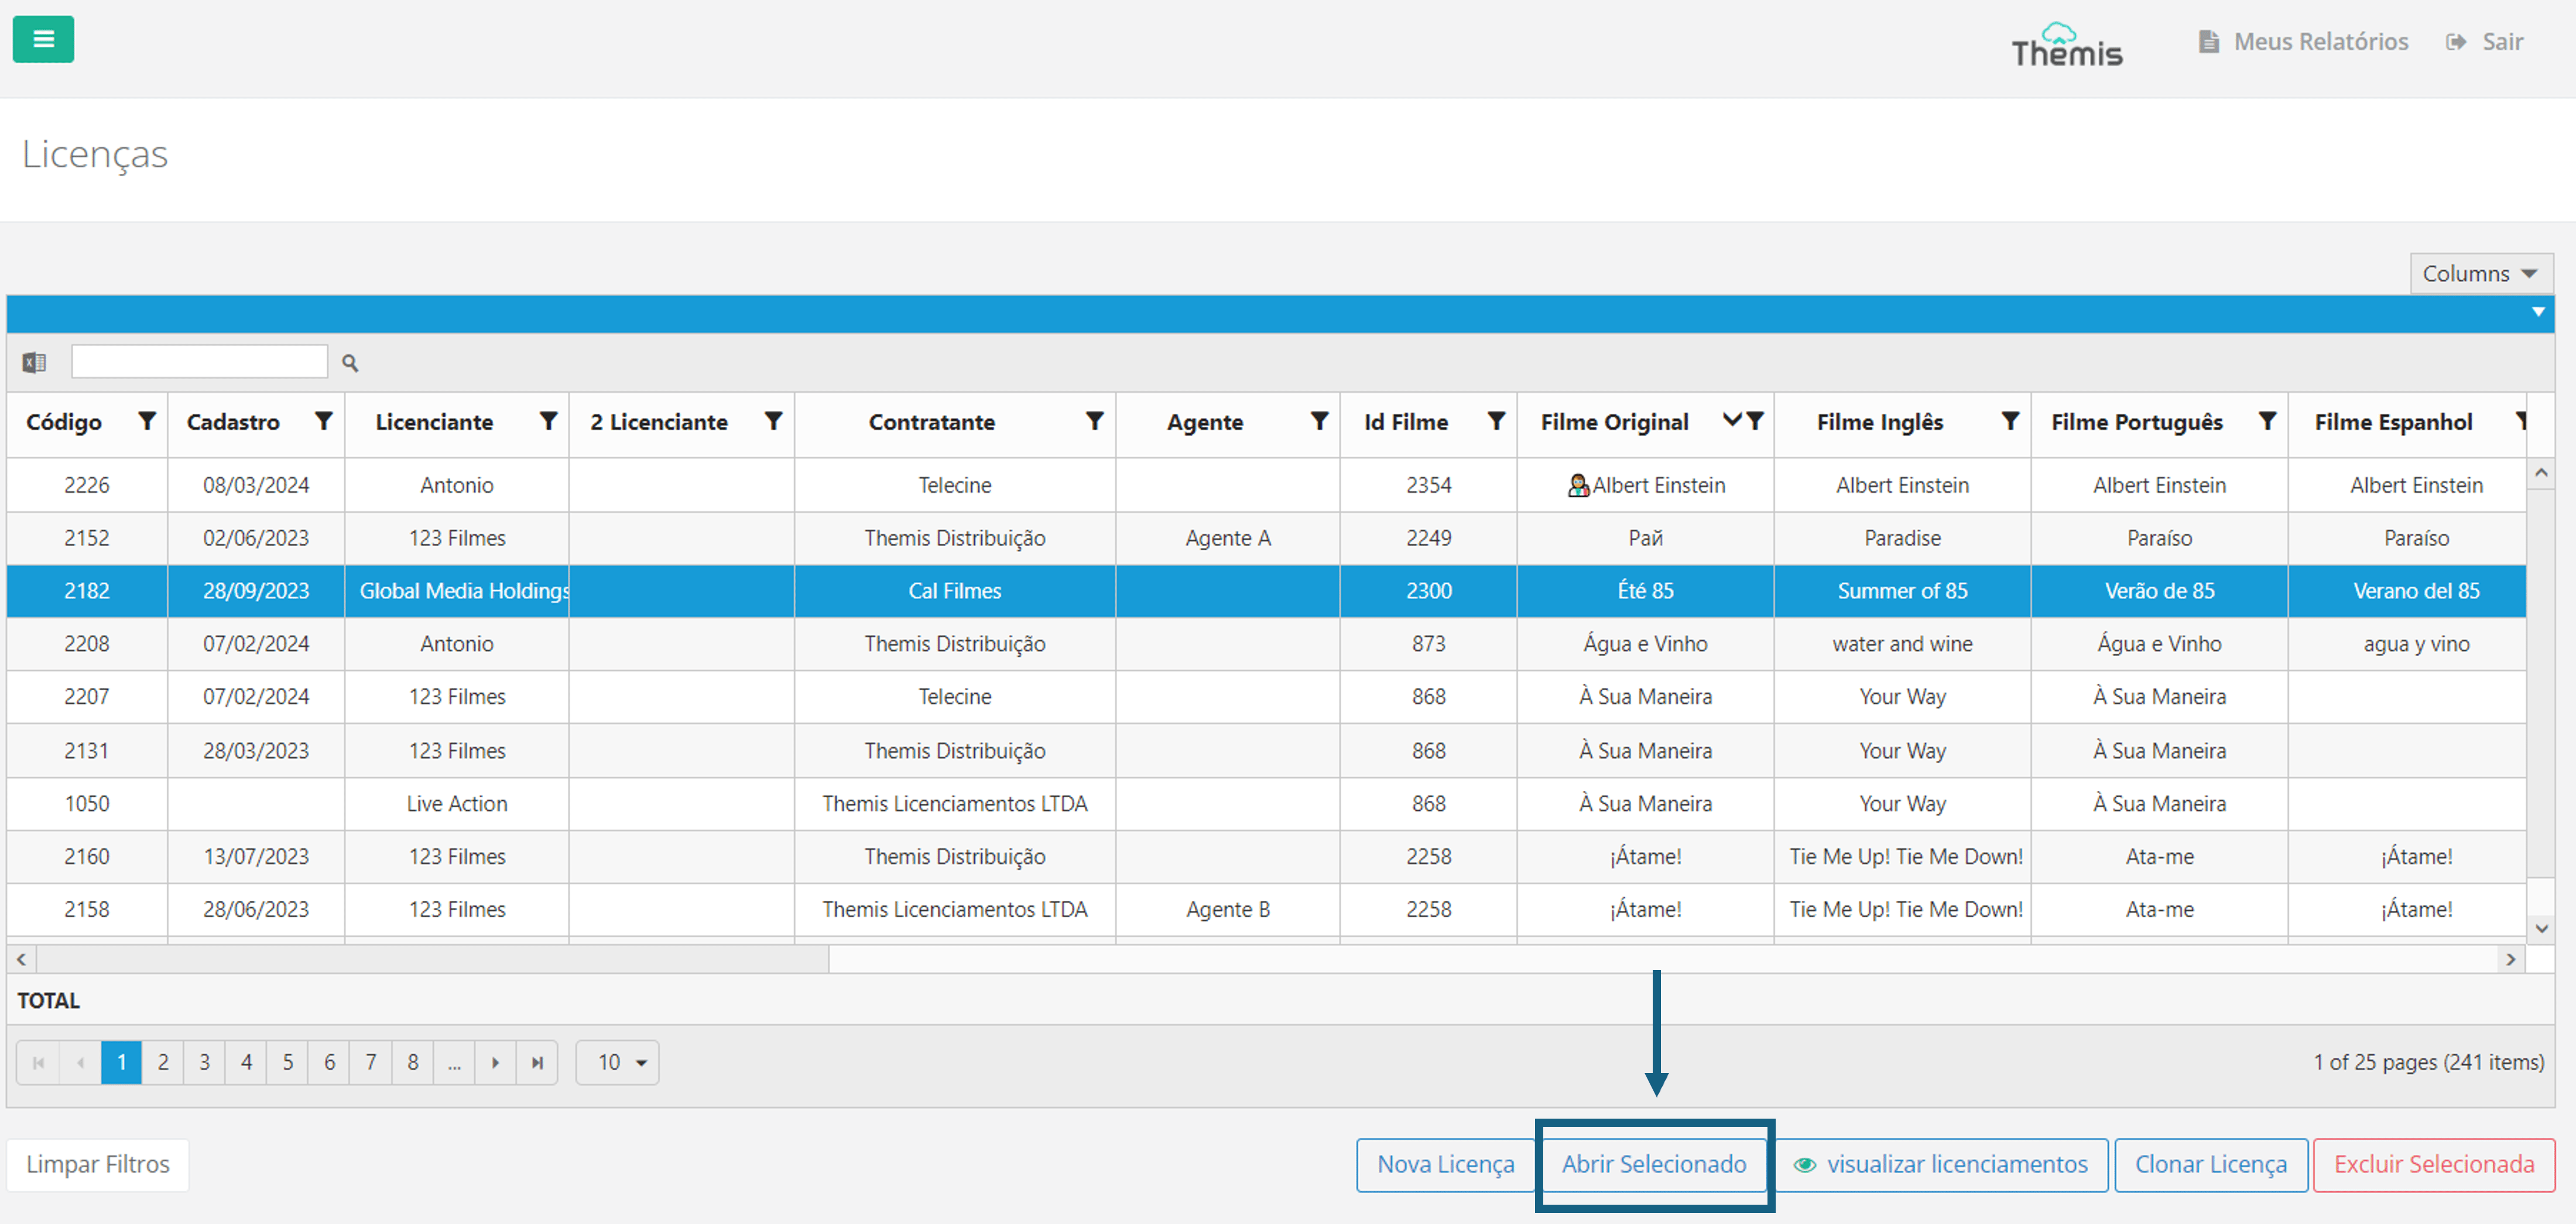
Once you find the License you want to view details for, select the title and click "Open Selected" or double-click the desired License:
A new tab will open with all the License details:
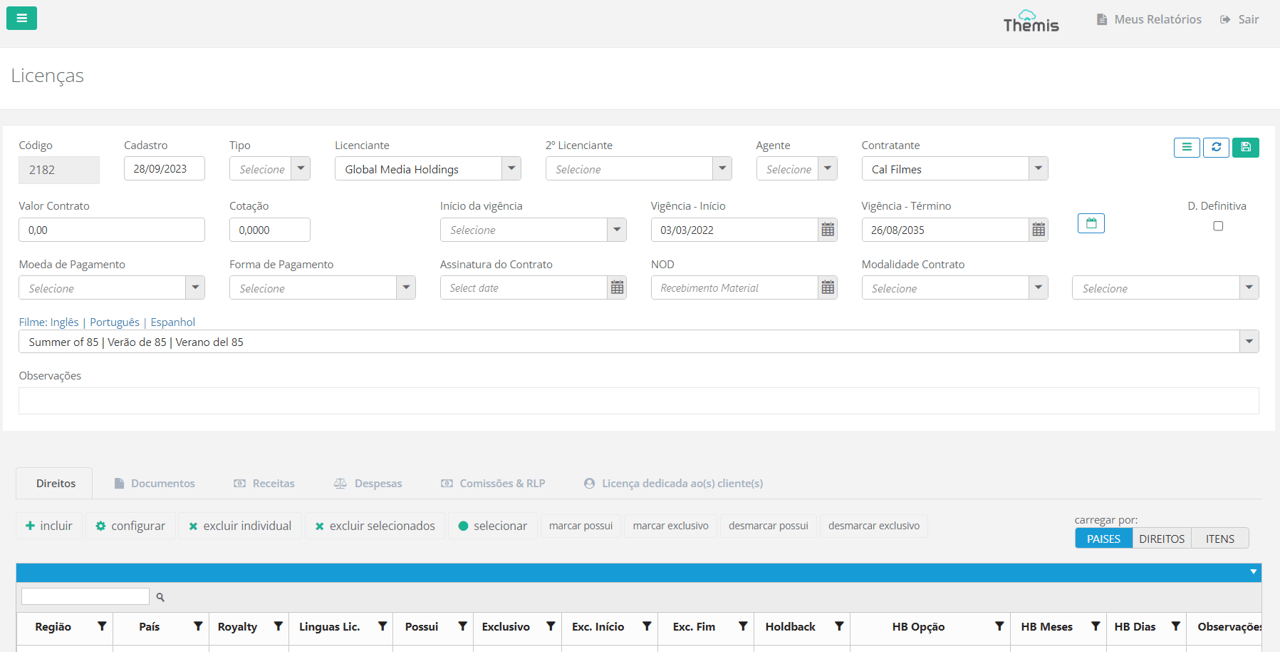
See below in Registering a New License, the details of each of the fields on the License details page.
Exporting License Reports to Excel
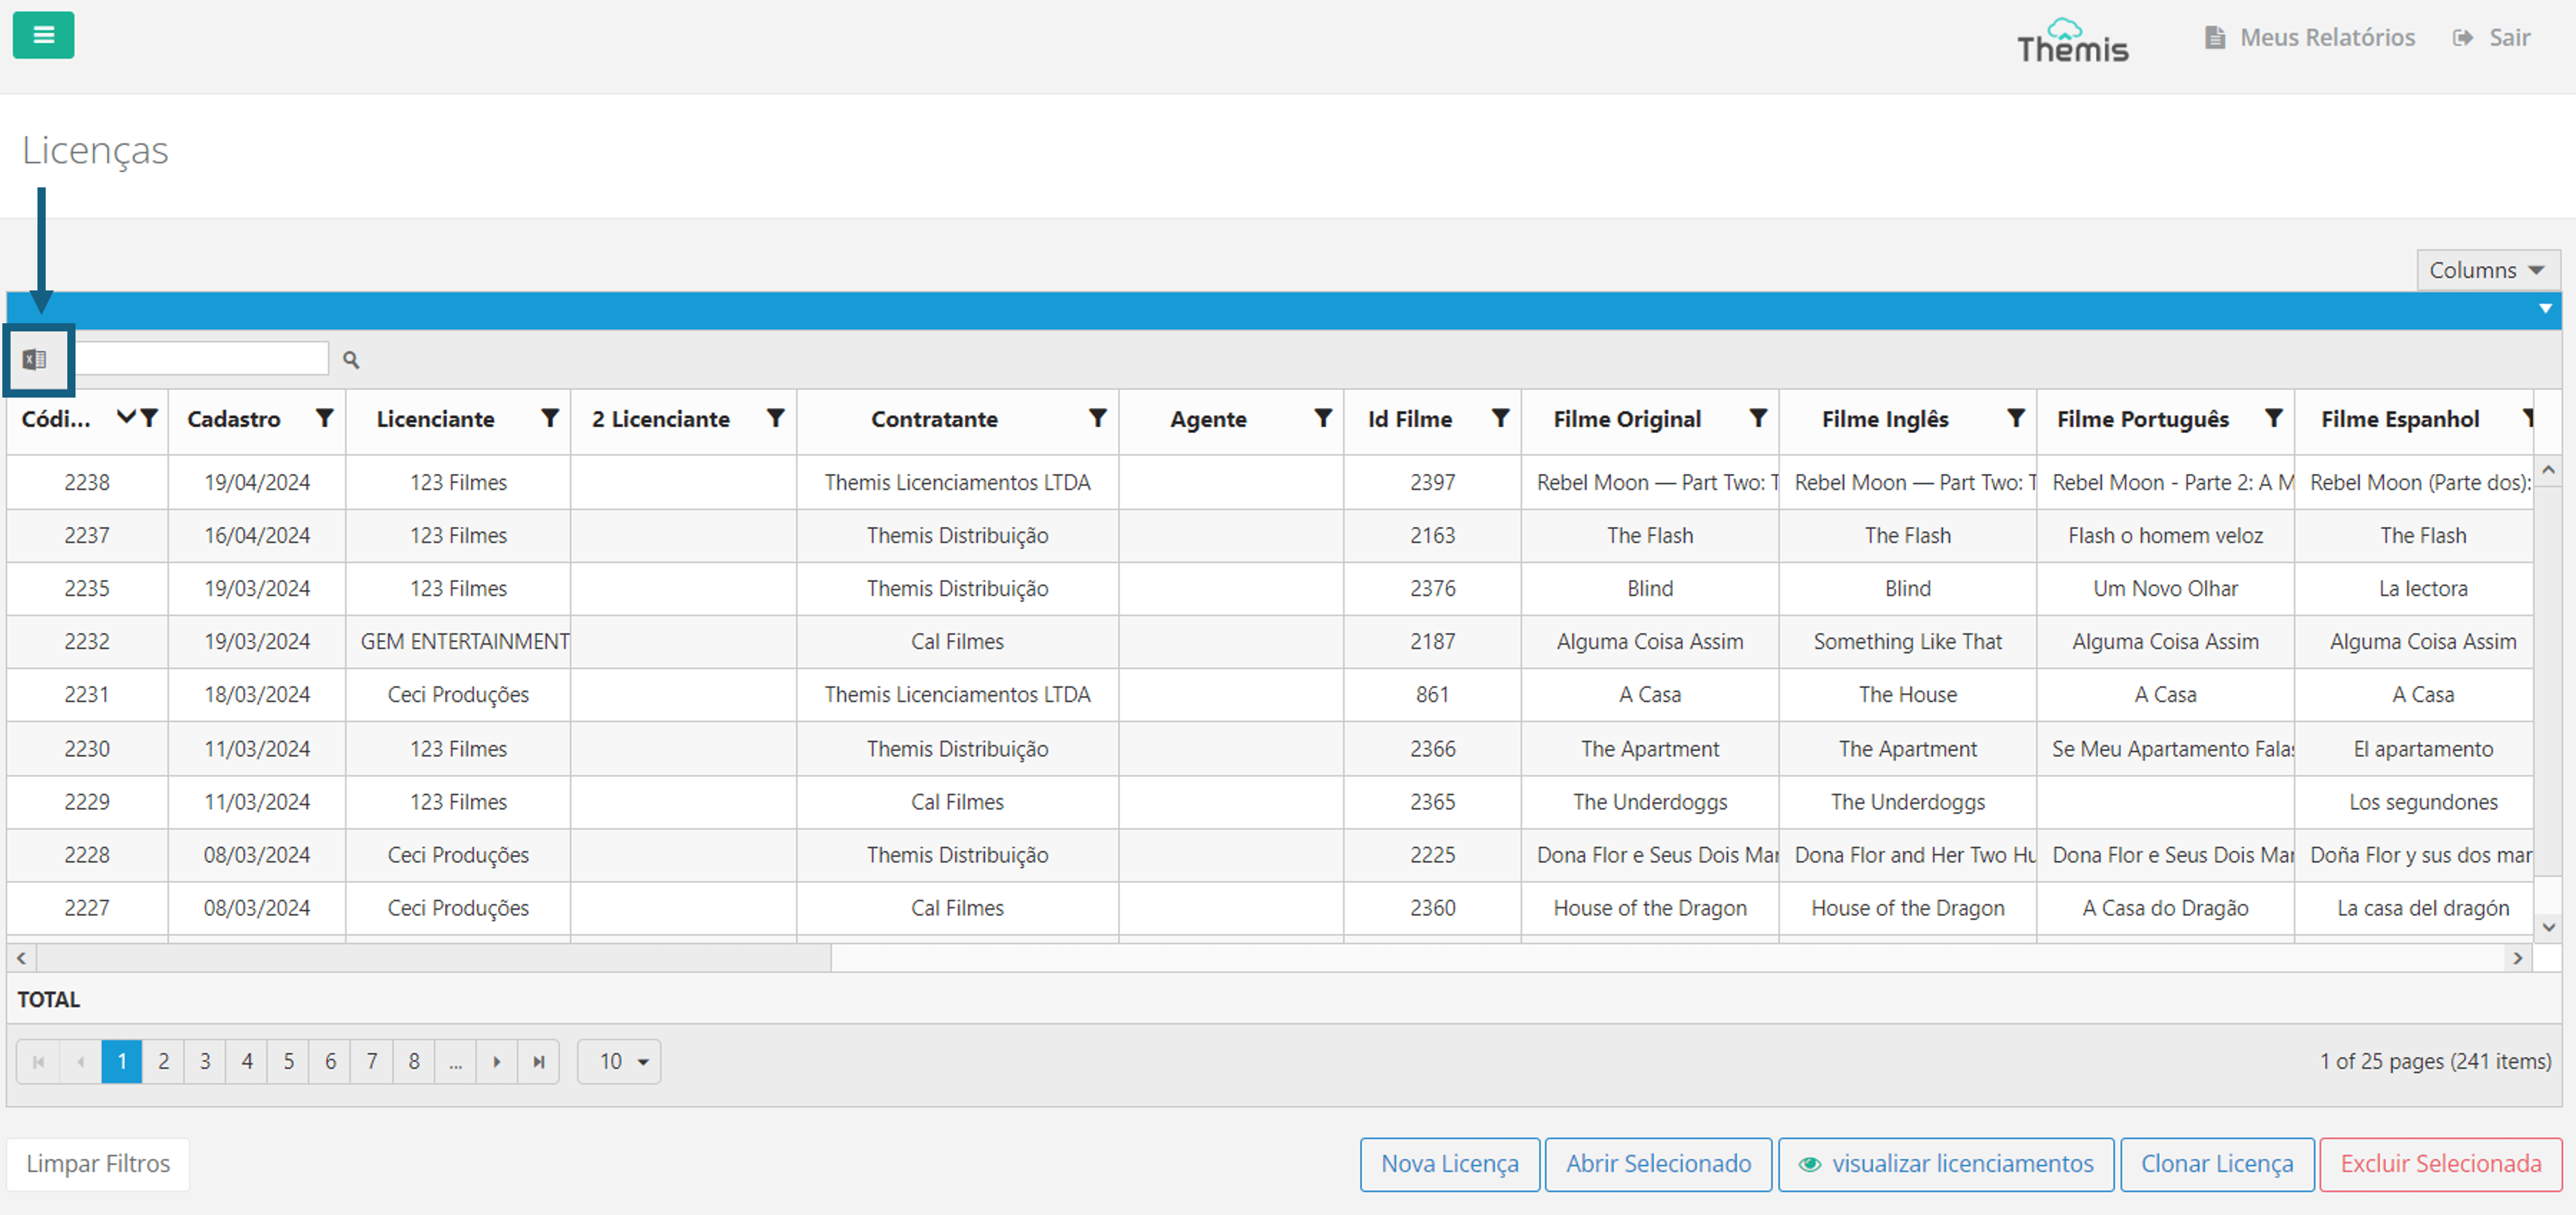
On the Licenses homepage, you can export the entire list displayed on the screen. You can customize the export by applying filters and choosing which columns to display. As explained above, in the Consulting Licenses section, follow the customization process. Then, click the "Excel" icon located in the top left corner of the screen. The download will start automatically:
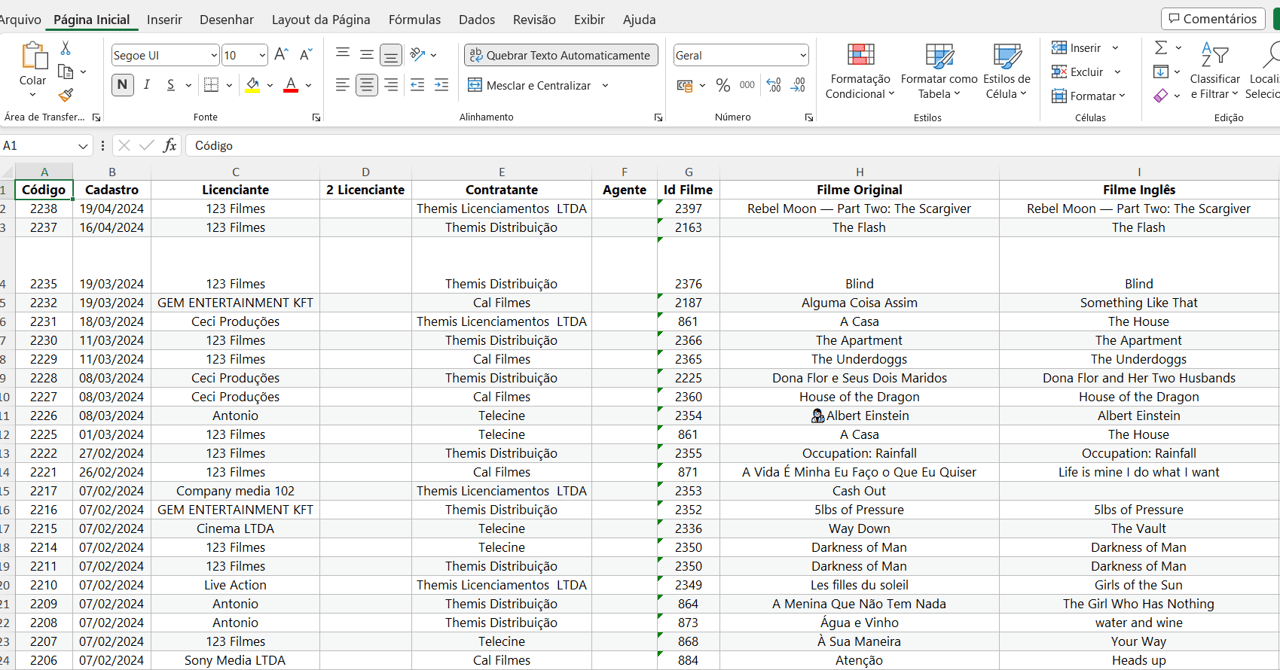
The exported report will look like the example below:
Registering a New License
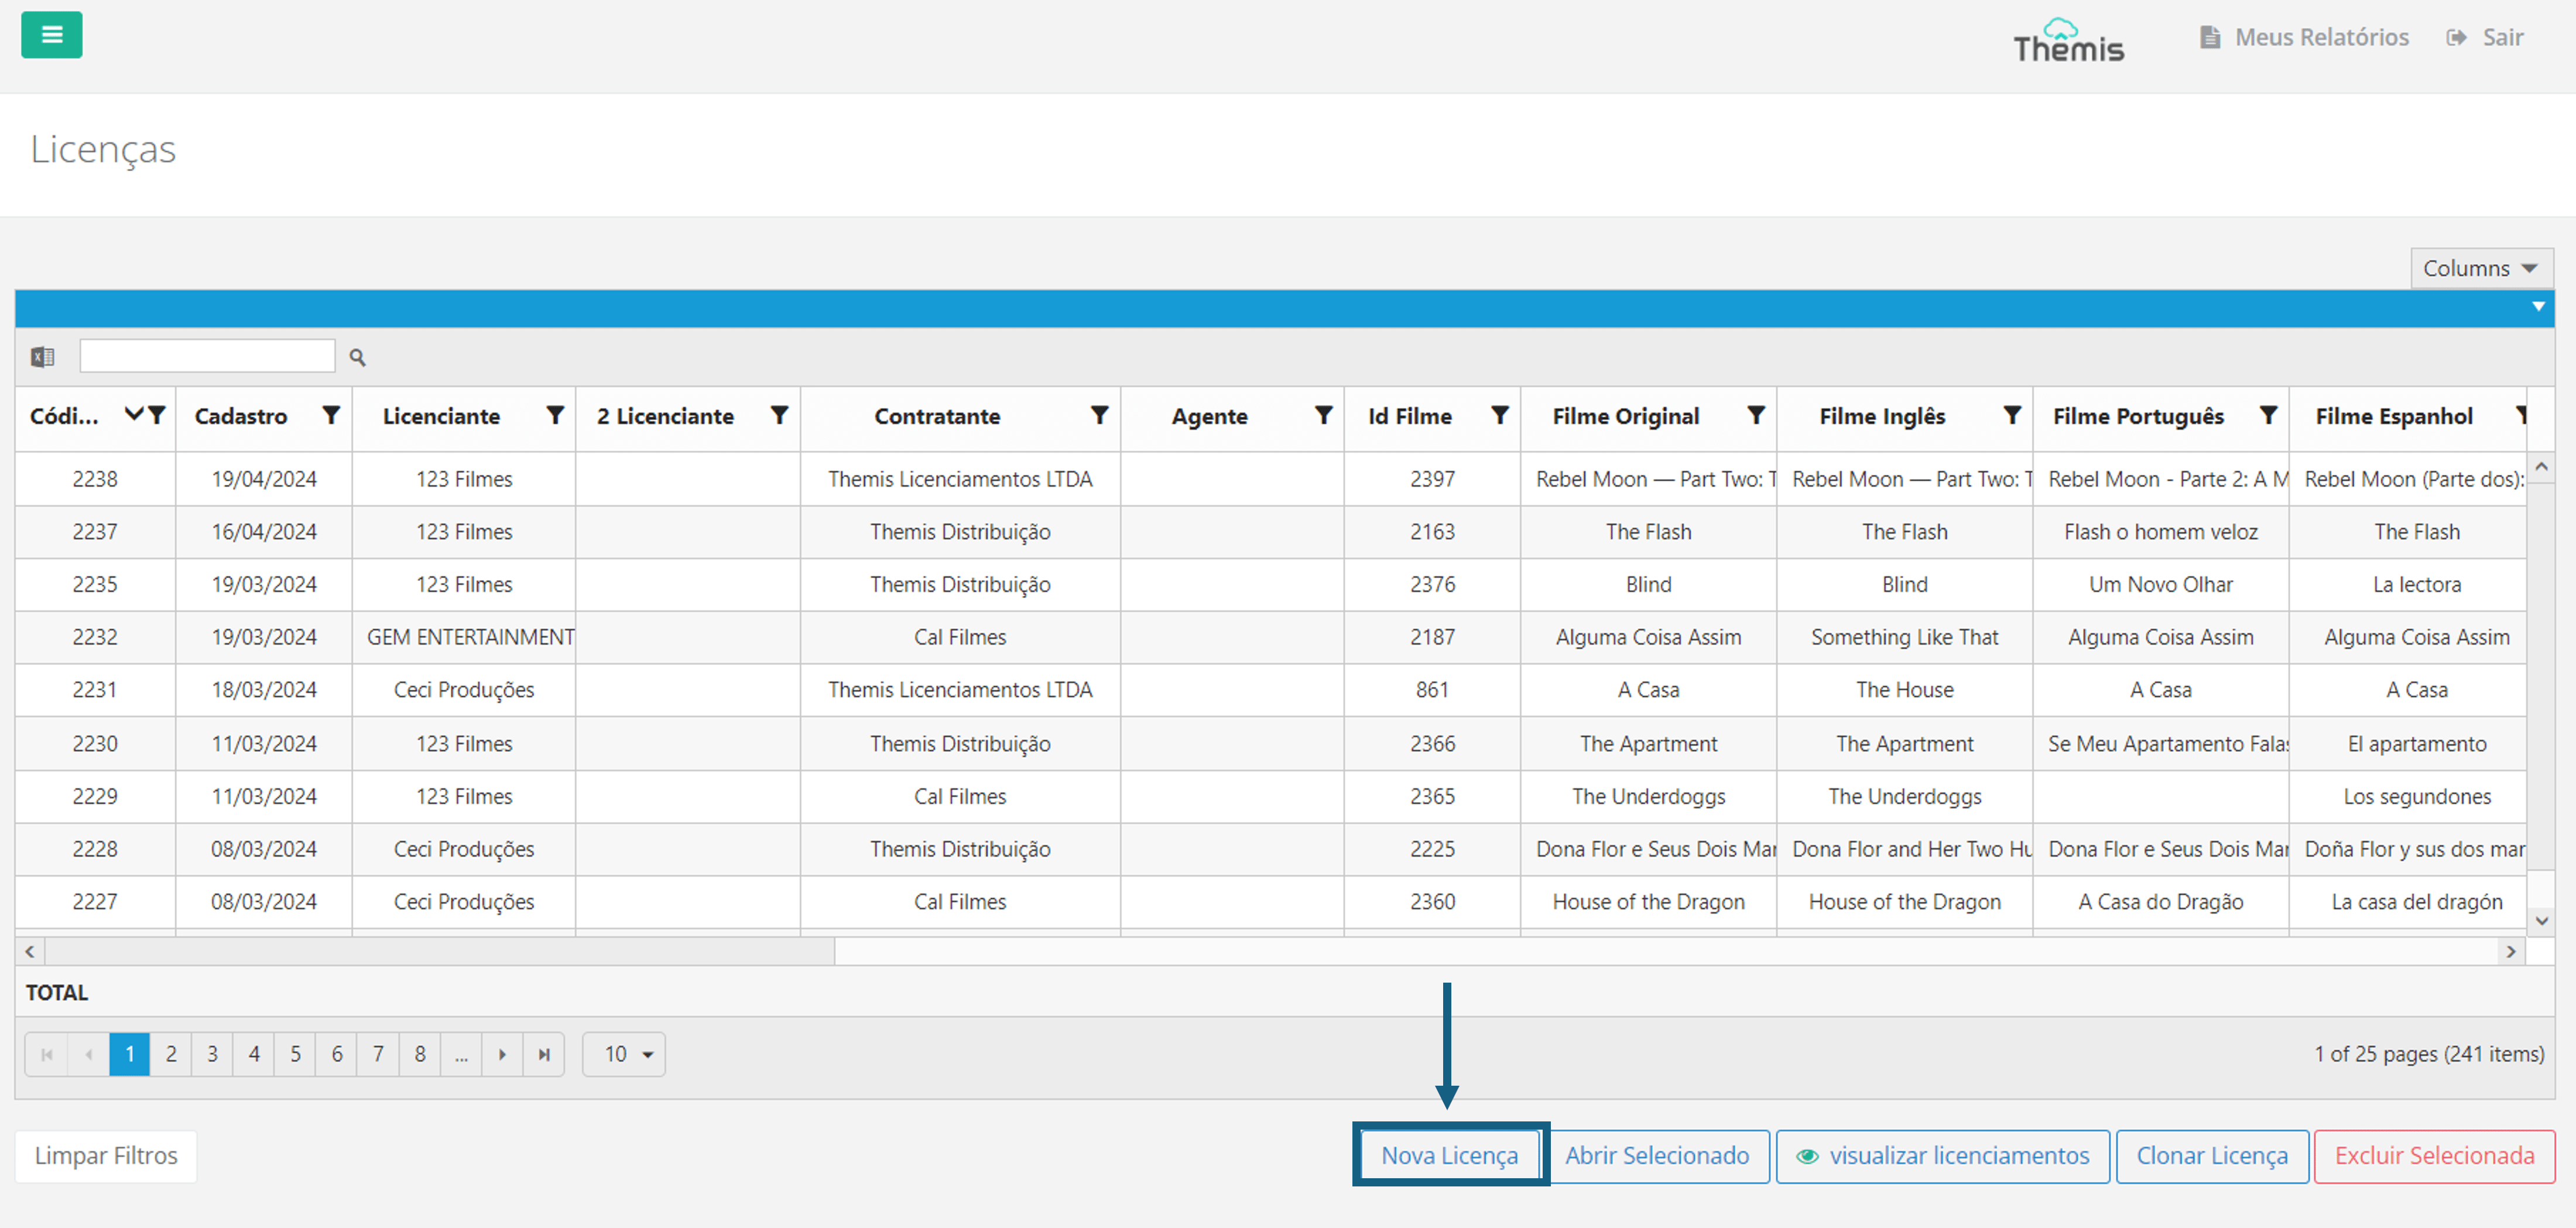
1. To register a new License for a film or series, access the **Licenses** homepage and click "New License":
2. A pop-up window will appear for you to fill in the initial requested fields:
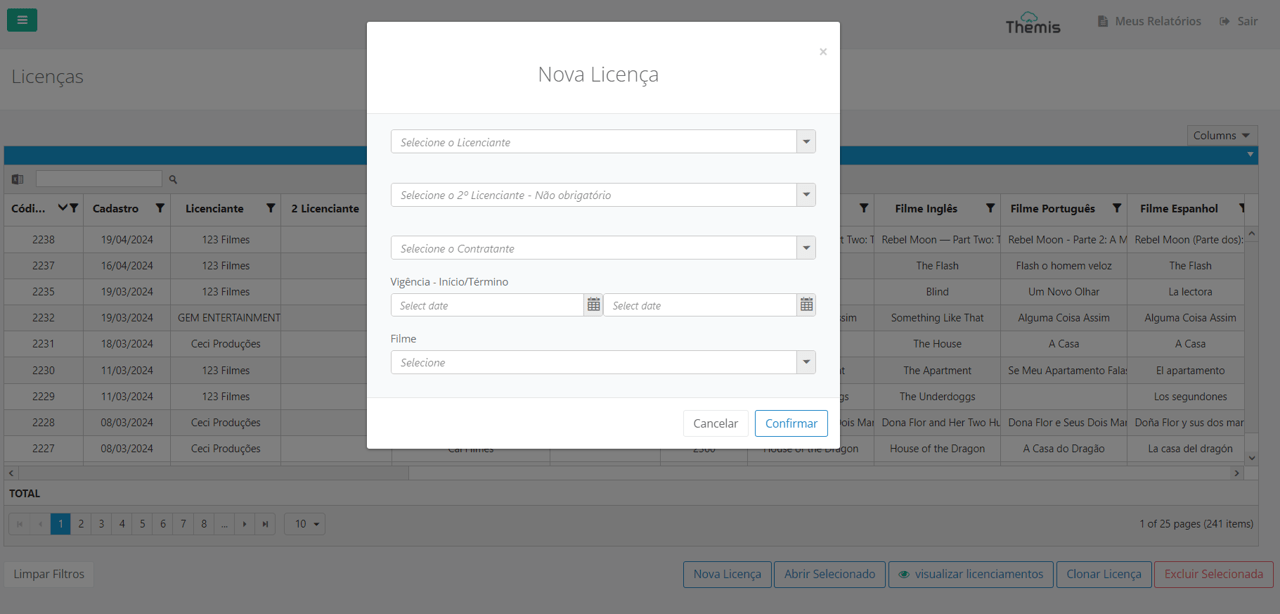
- Licensor: Choose from the drop-down list which company this License will be purchased from. Learn how to edit the licensor list;
- 2nd Licensor: Optional field for a second licensor, if necessary.
- Contractor: Choose from the drop-down list who is purchasing the License. Learn how to edit the contractor list.
- Duration – Start and End: Enter the start and end dates of the contract.
- Film: Select the film or series from the drop-down list to create the License. The title must already be registered on the platform. Learn more about this registration click here.
3. The License Editing page will open. Let’s break down the highlighted fields from the image below:
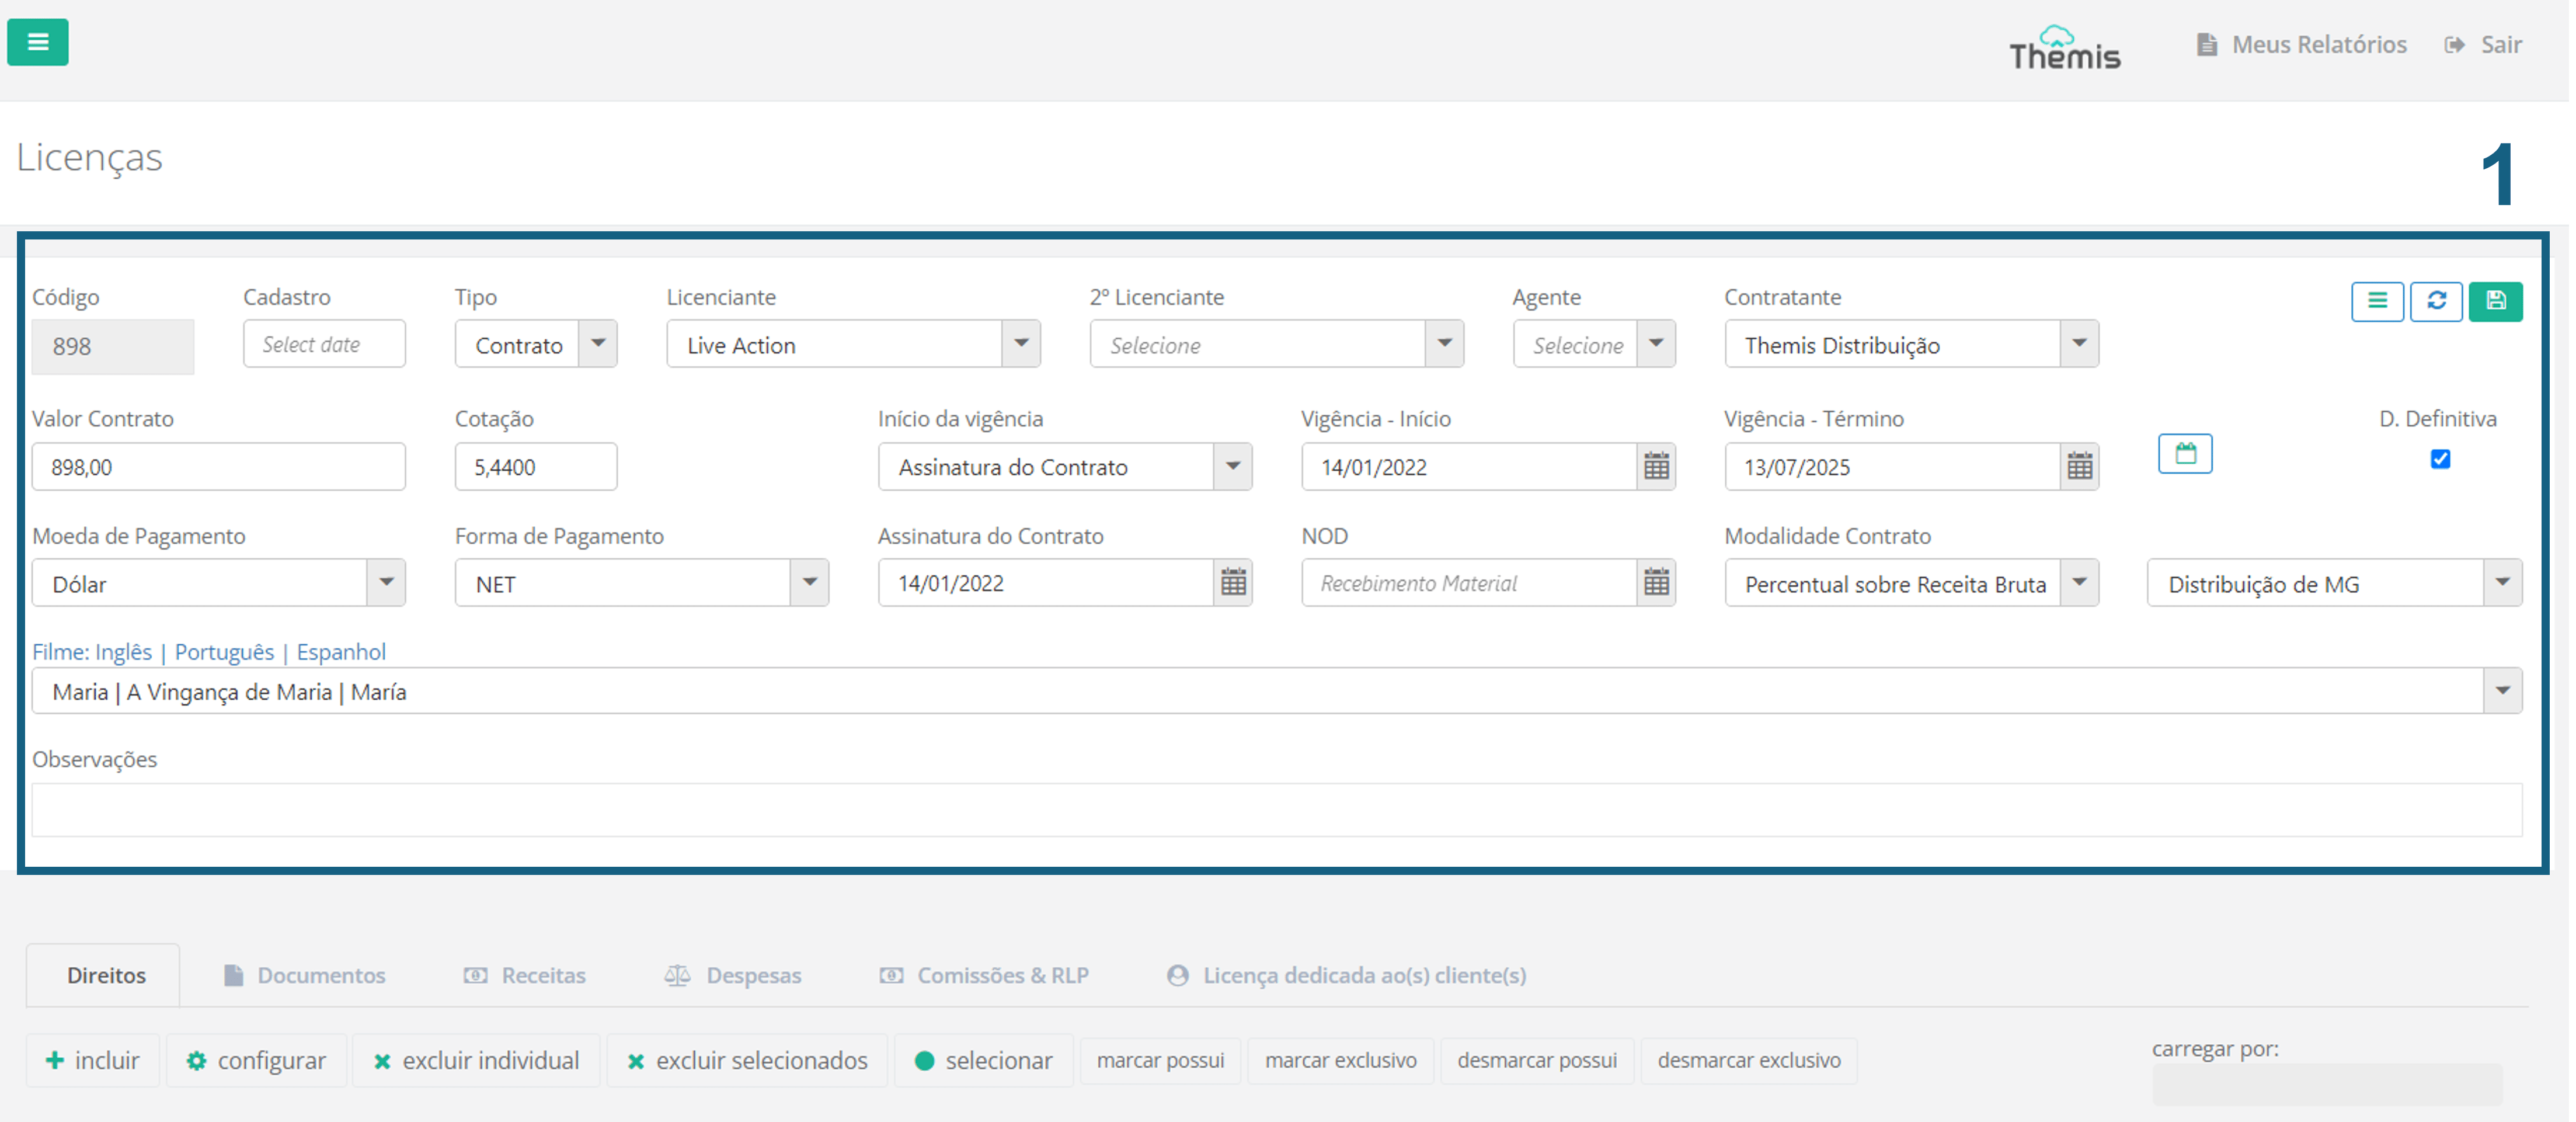
- Code: Automatically filled by the system without editing options.
- Registration Date: Select the license registration date.
- Type: Choose between "Contract" and "Deal Memo."
- Licensor: Choose from the drop-down list which company this License will be purchased from. Learn how to edit the licensor list;
- 2nd Licensor: Optional field for a second licensor.
- Agent: Choose from the drop-down list the Agent, if necessary. Learn more about "Agents" click here.
- Contractor: Choose from the drop-down list who is purchasing the License. Learn how to edit the contractor list.
- Contract Value: Enter the contract value.
- Exchange Rate: Enter the exchange rate if the payment currency is Euro, Dollar, or Pound.
- Payment Currency: Choose the payment currency from the drop-down list.
- Payment Method: Choose between "Gross" or "NET."
- Start of Duration: Choose from five options (Deal Memo signing, contract signing, holdback release, others, or NOD receipt) when the License duration will begin.
- Duration Start: Confirm the start date of the License.
- Duration End: Confirm the end date of the License.
- Generate Duration End: Clicking the calendar icon next to the “duration end” field allows you to configure the system to link the duration end to a reference such as contract signing, NOD receipt, or the duration start. Fill in the contract duration, reference, and click "Insert."
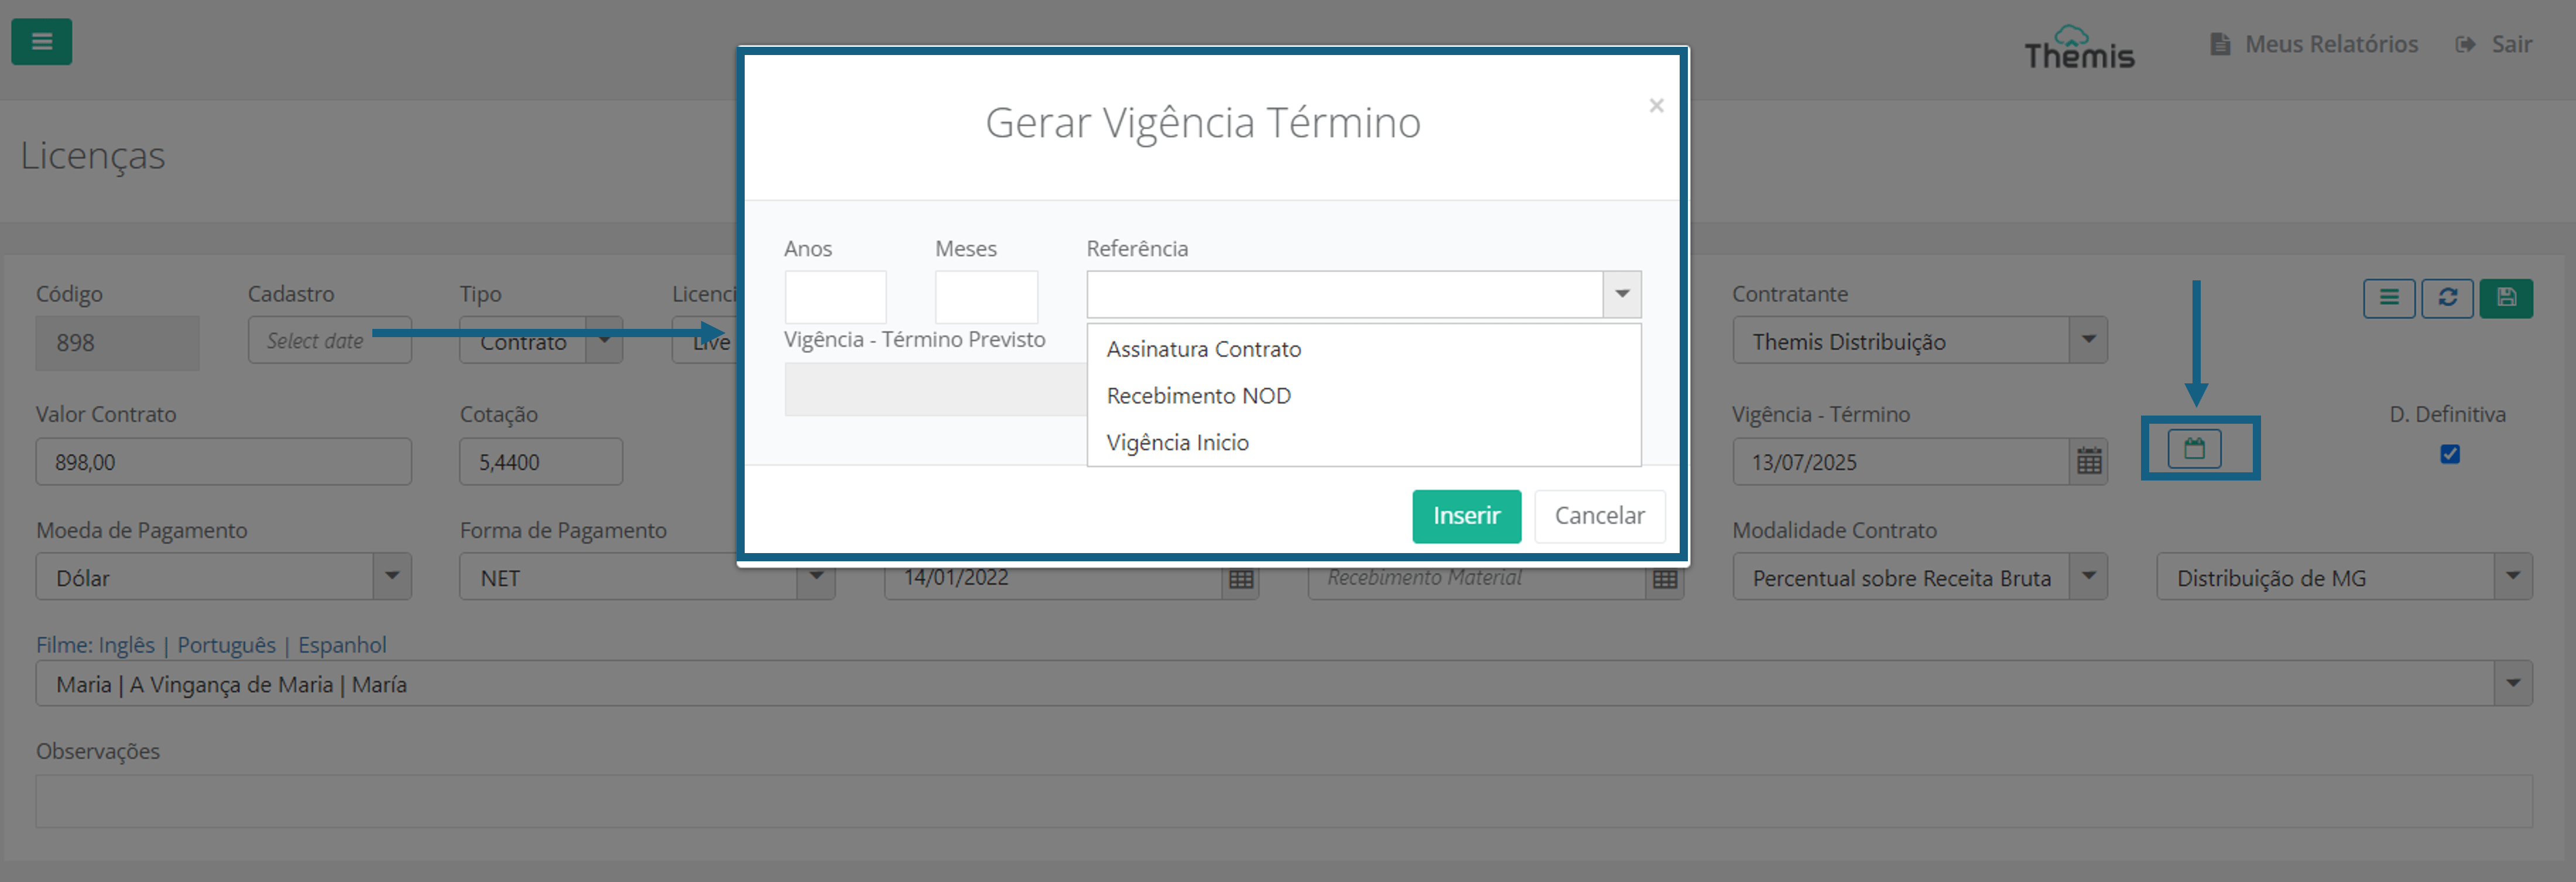
- Contract Signing: Fill in the contract signing date.
- NOD: Enter the material receipt date.
- Contract Type: Choose between "Percentage of gross revenue" or "Fixed price."
- Distribution: Choose between "MG Distribution" or "Flat."
- D. DefinitiveCheck this box for a license with a definitive date.
- Film:English | Portuguese | Spanish: Choose the title of the film or series in the 3 languages from the drop-down list. There is a search field to make it easier to find;
- Observations: Include any observations related to the License.
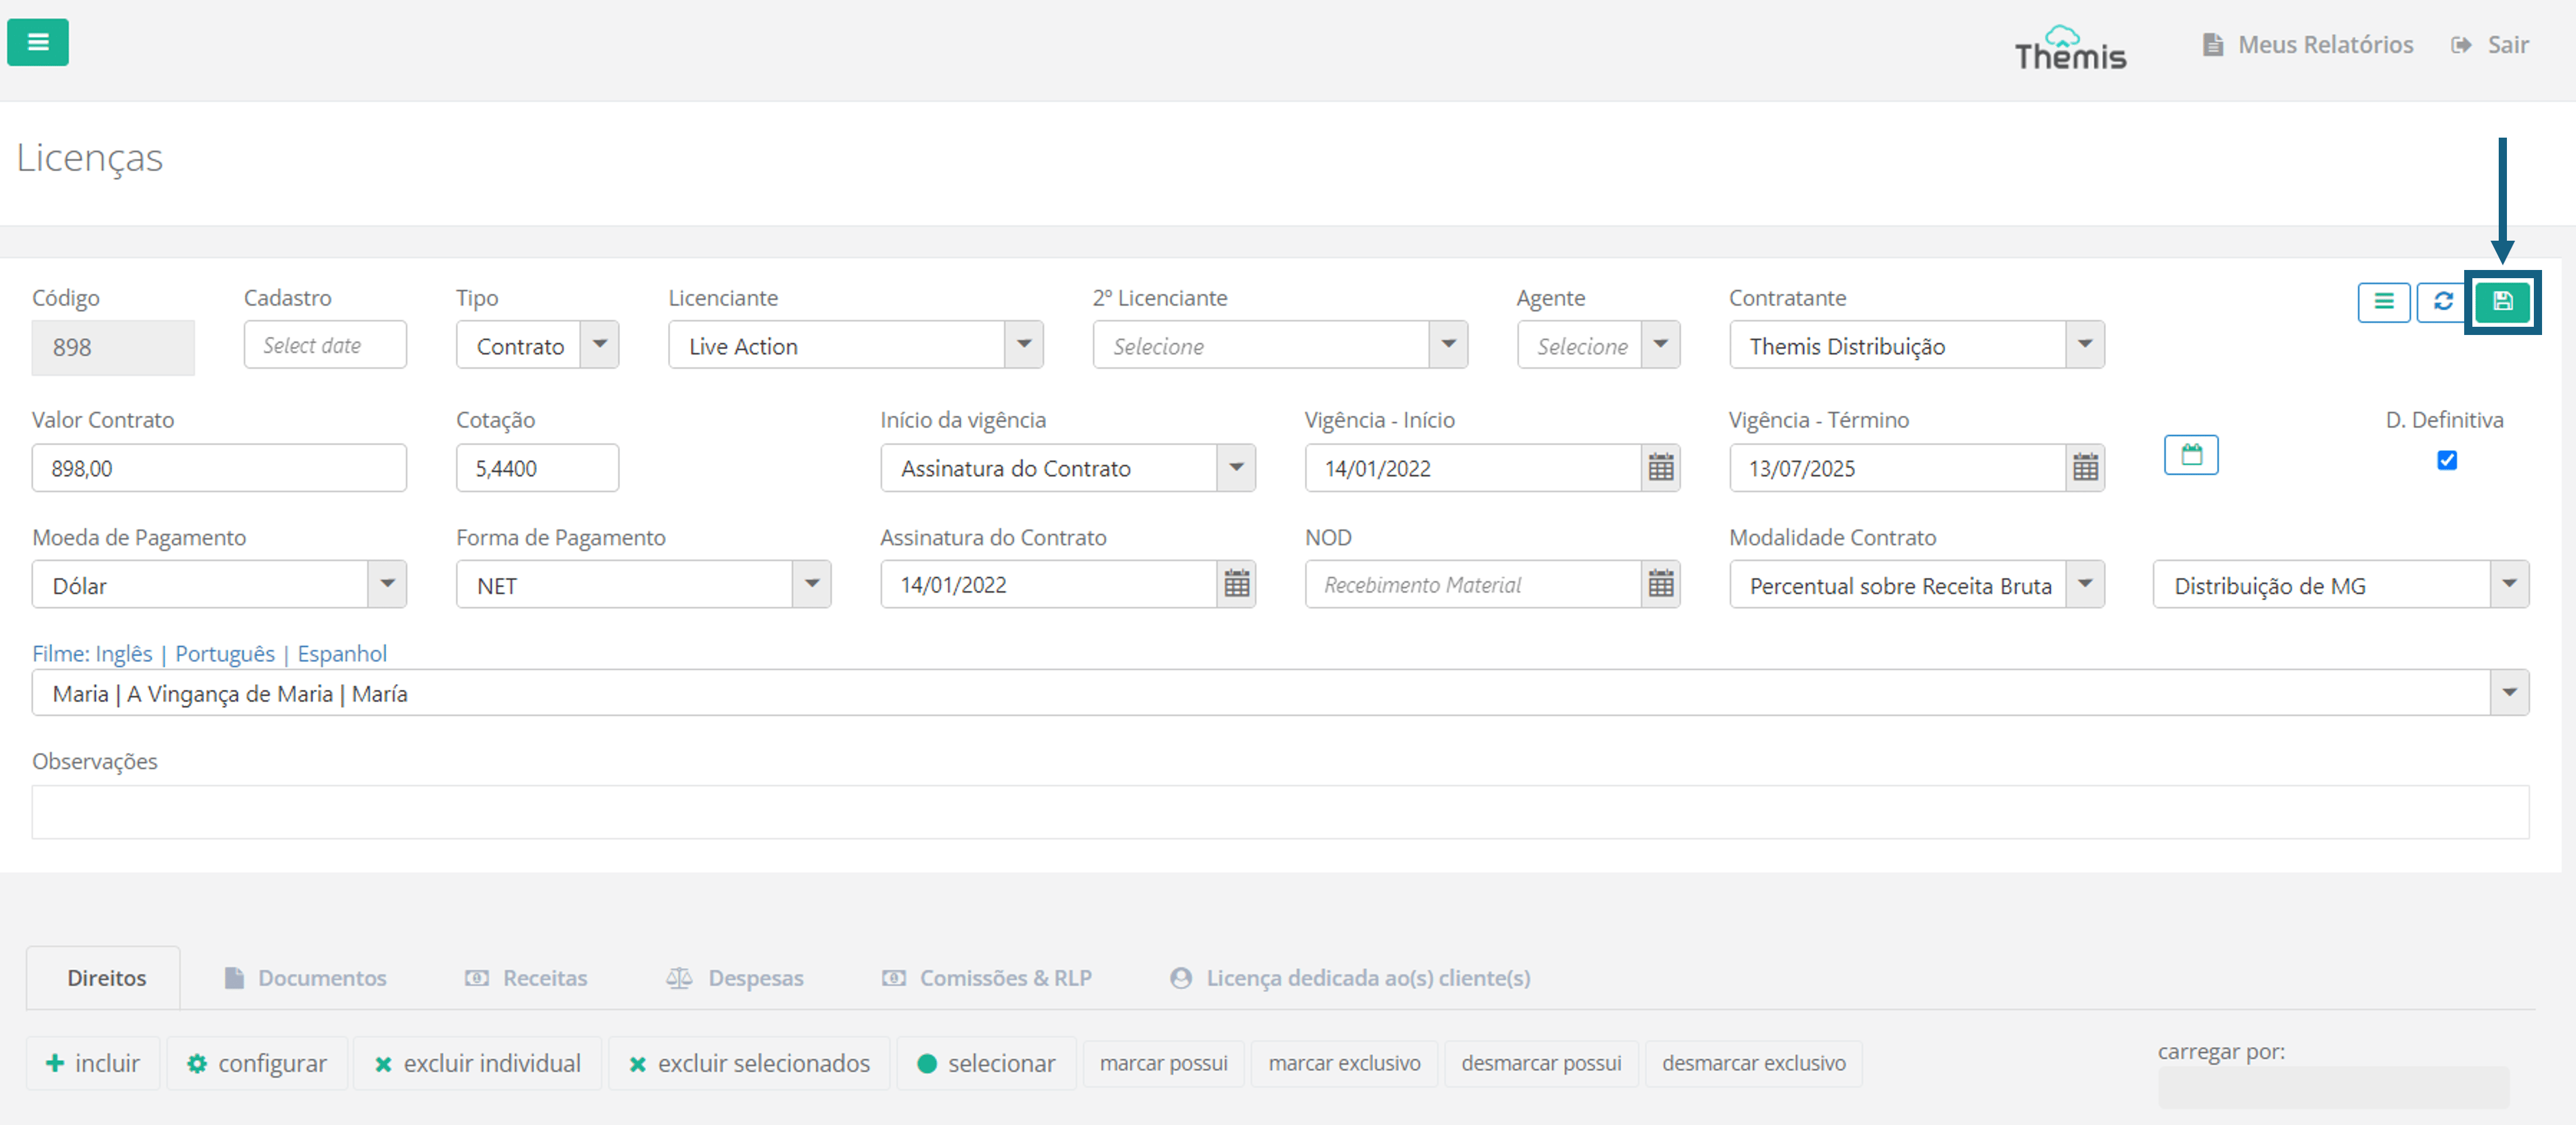
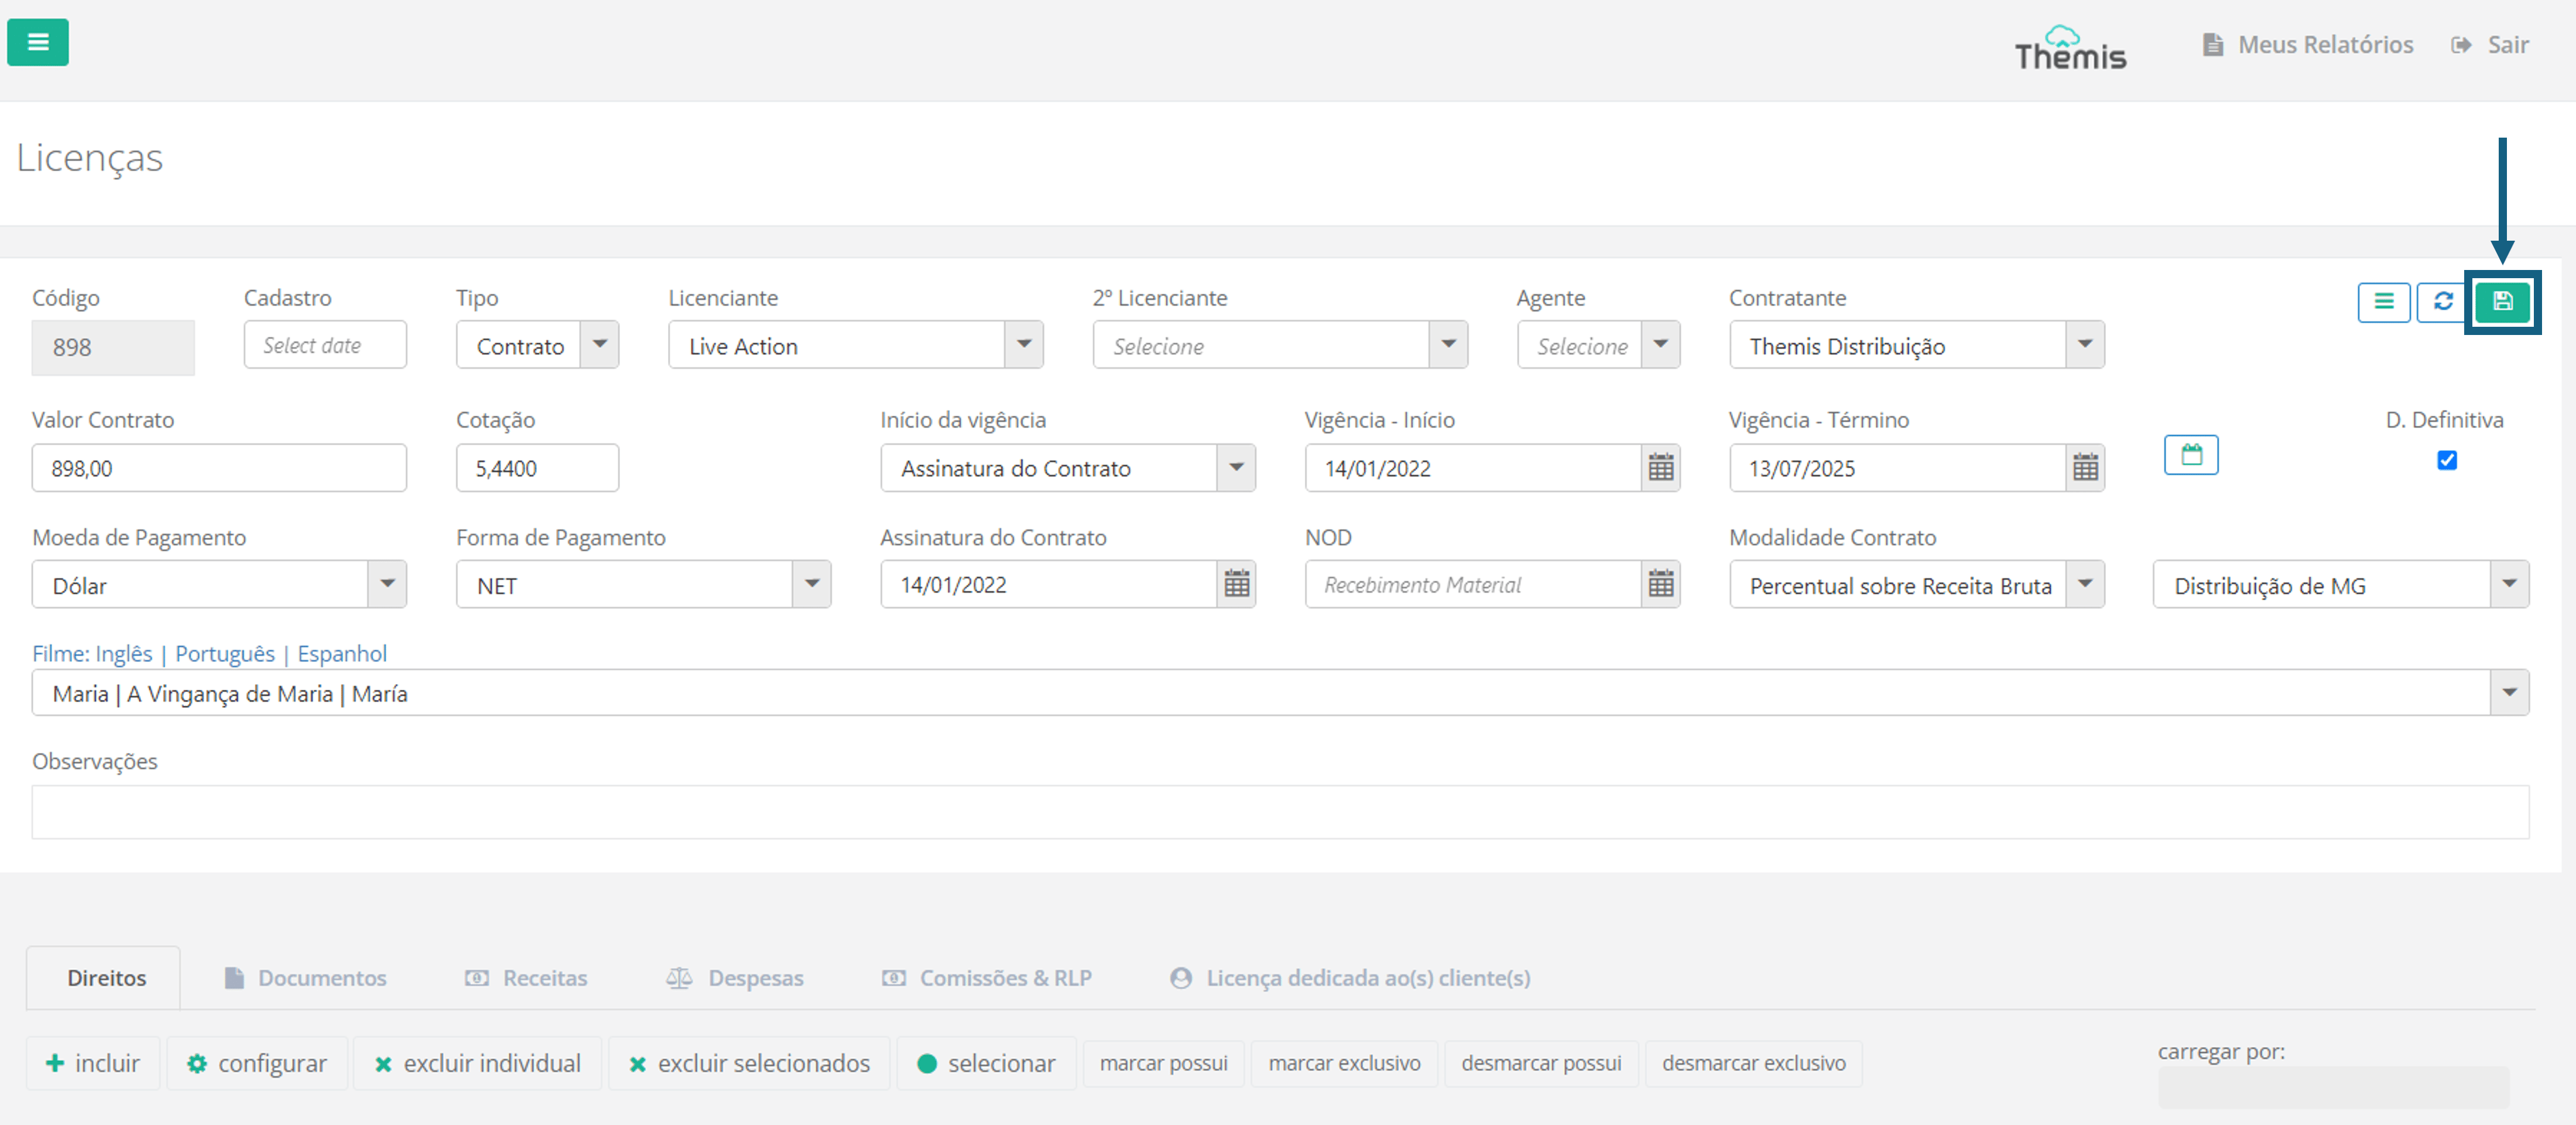
4. After completing all information, click the disk icon to save the new License:
5. Now let's go through each of the tabs, available at the bottom of the screen, to configure the License details. Let's start with the "Rights":
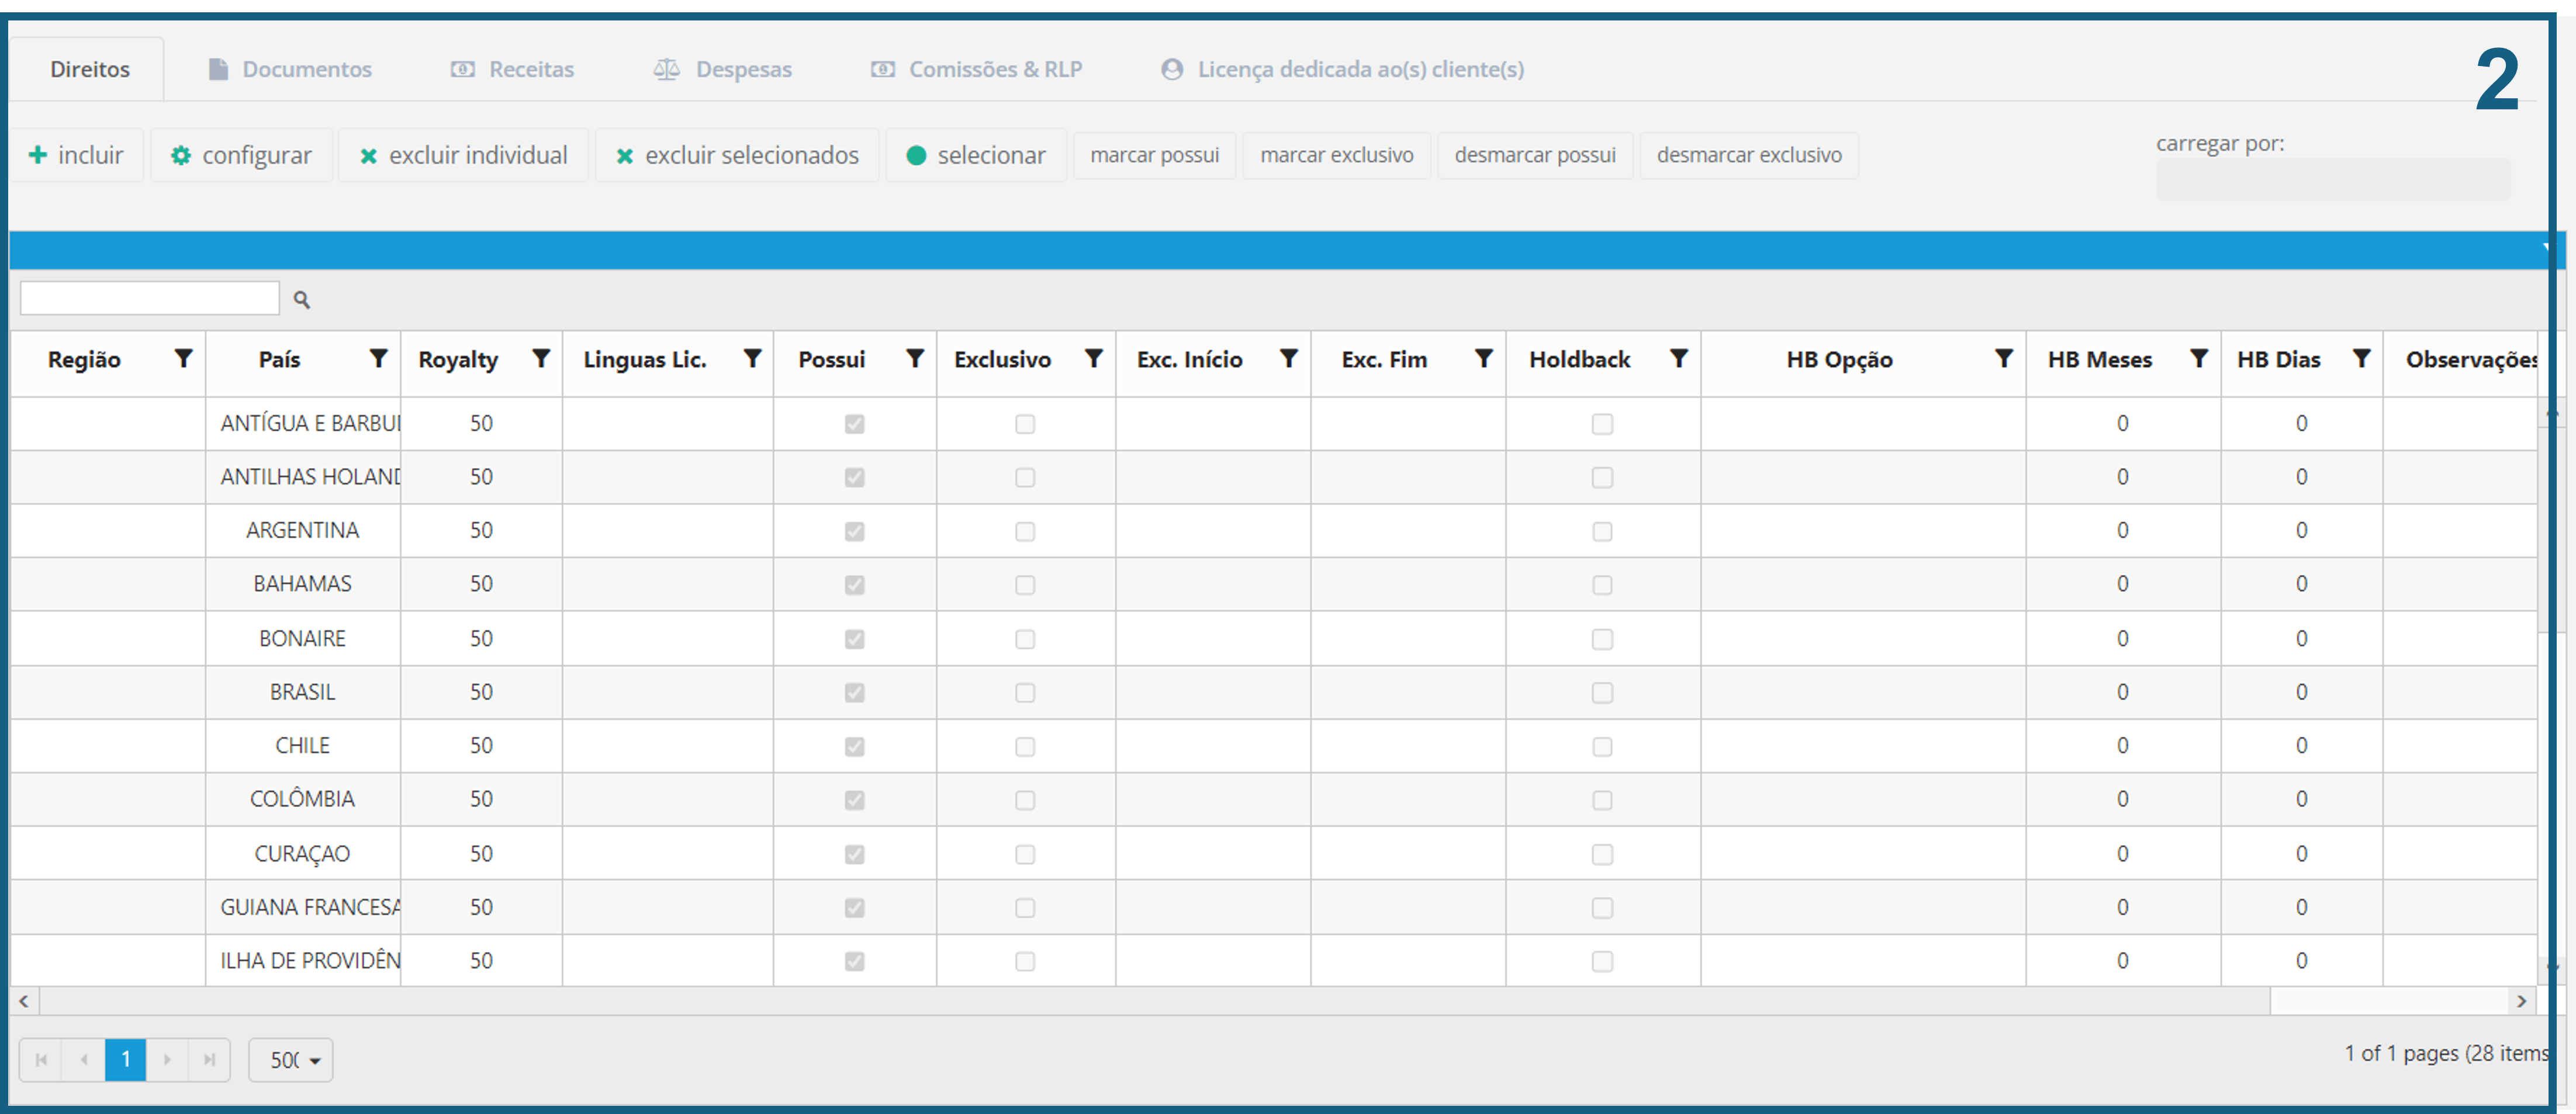
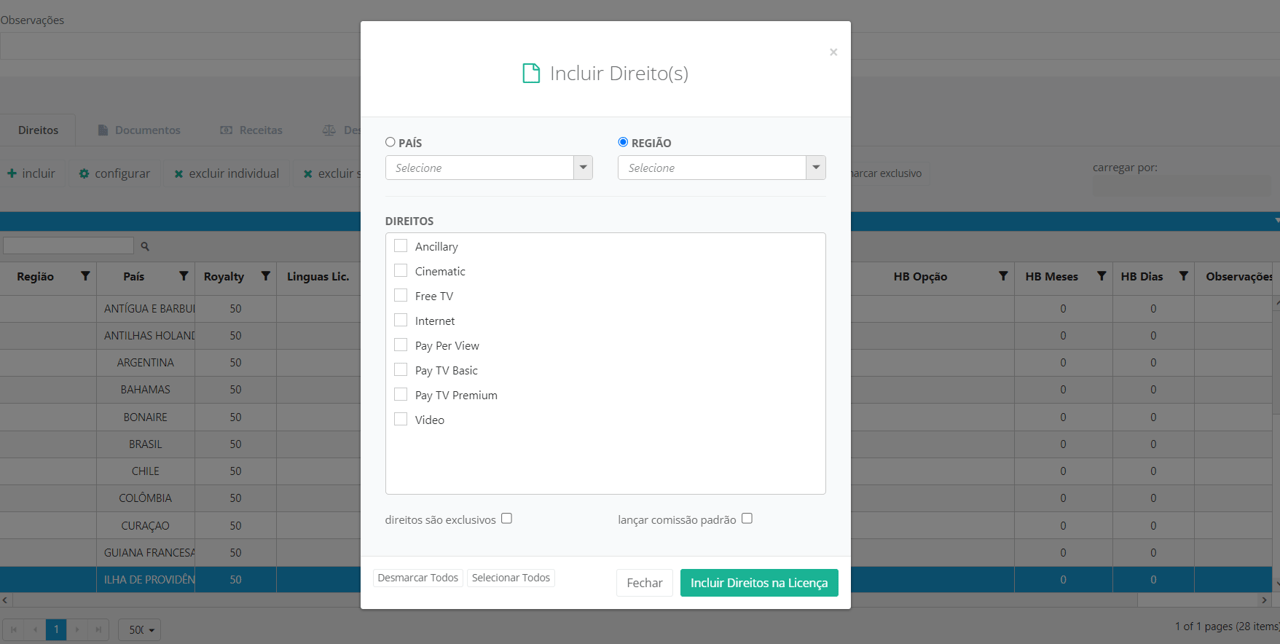
- To register a new right, click on “include”. In the pop-up that will open, you can register the rights by Region or Country. Then, select all the rights included in this license. You can also check the box “rights are exclusive”, if there are exclusivity in rights selected and check the “launch standard commission” box, if the commission for the rights is standard. After filling in all the fields, click on “include license rights” to complete the registration:
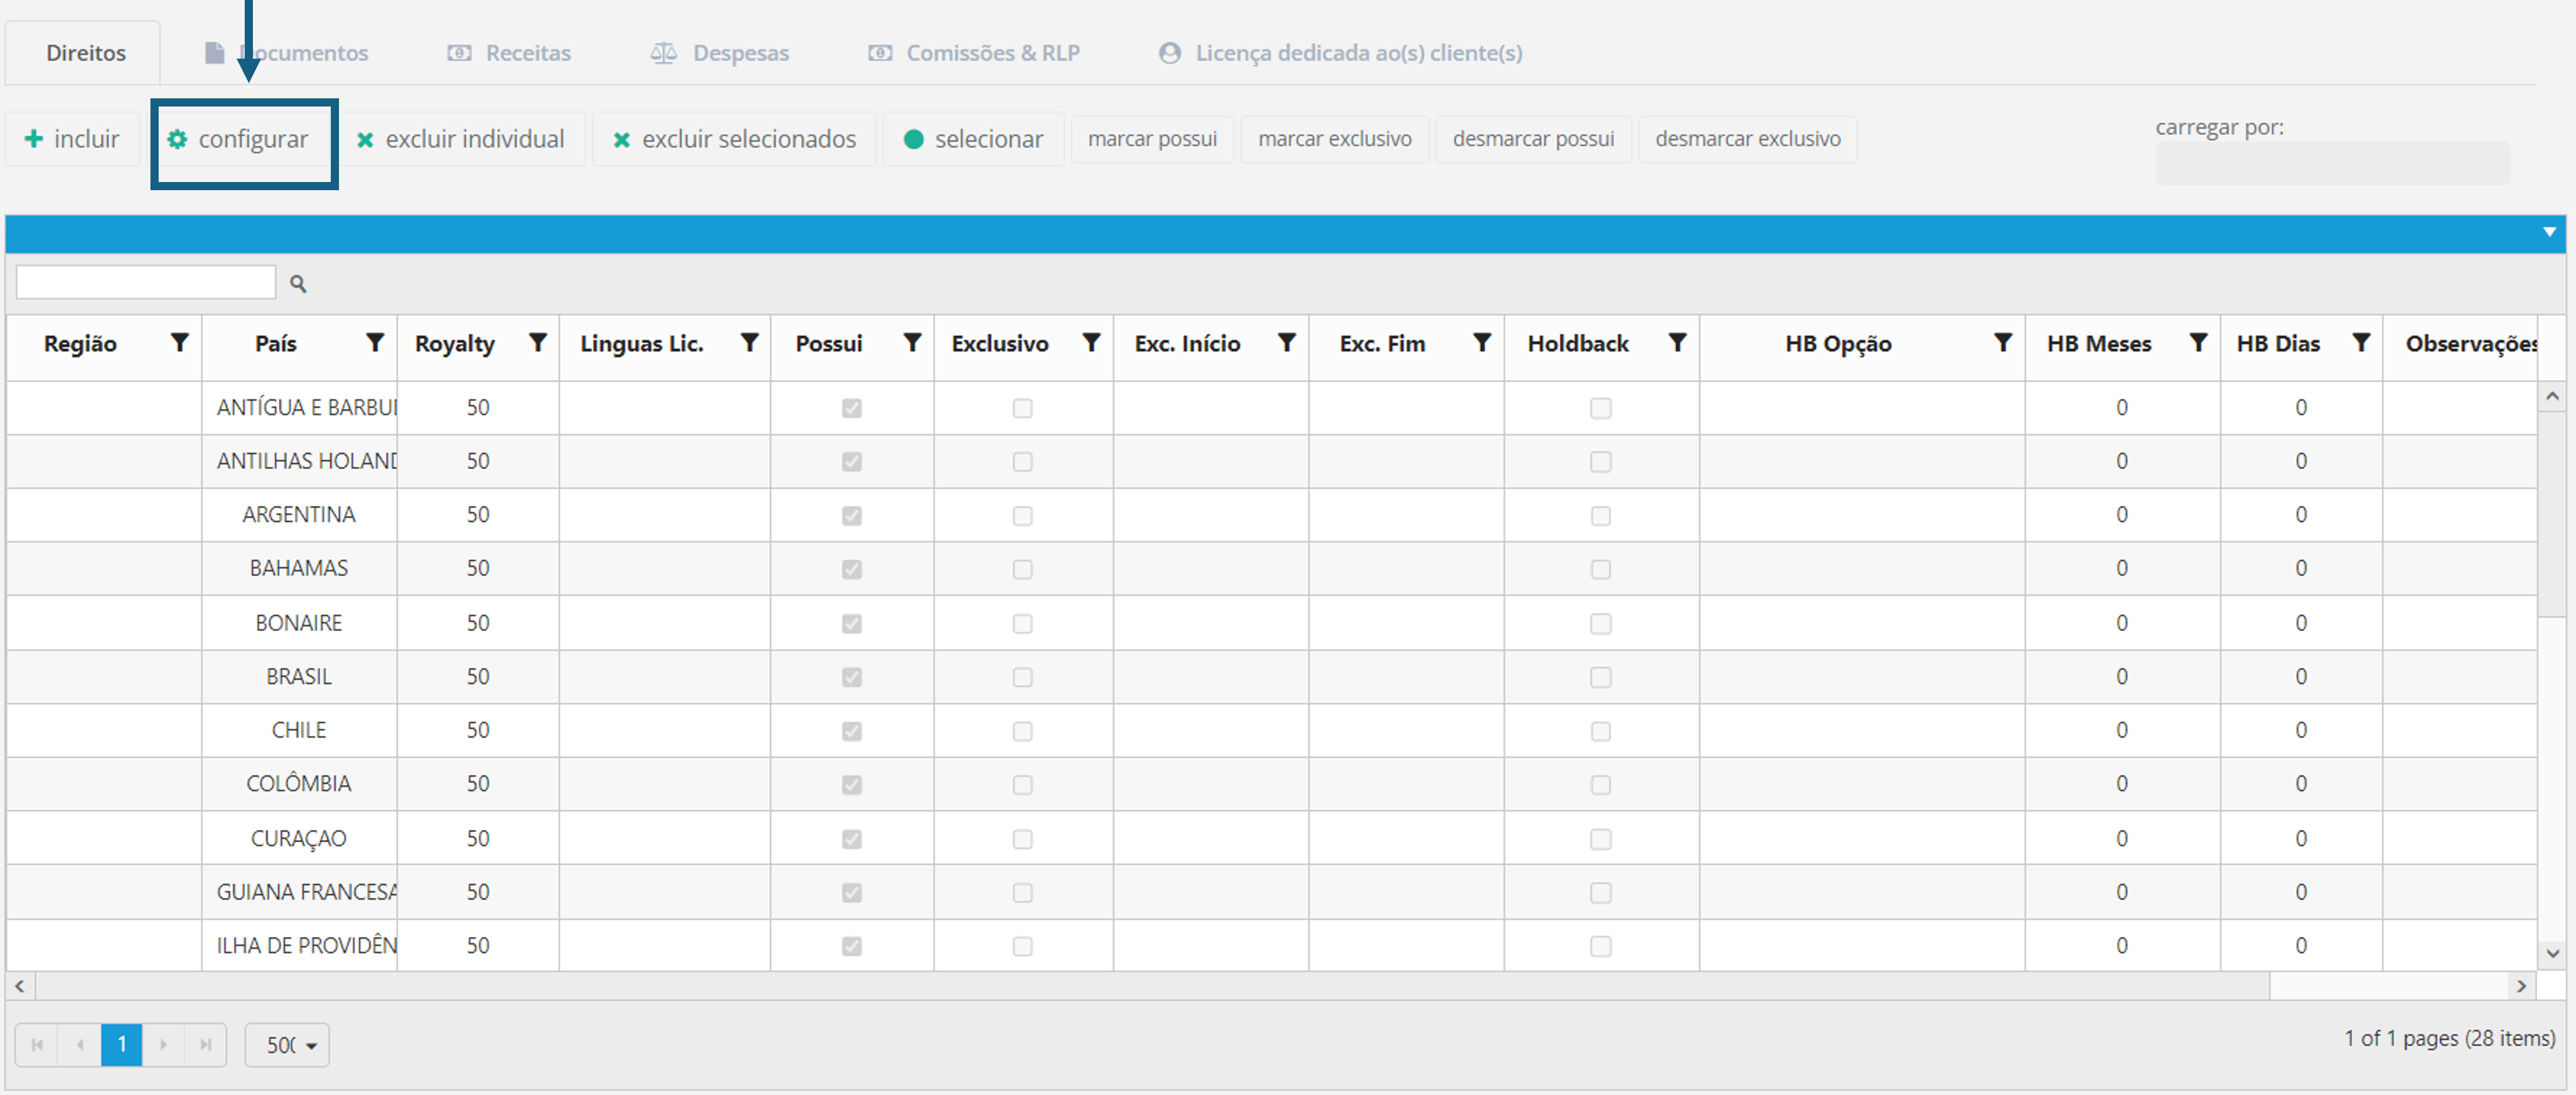
- After adding a new right, you can also configure the other options. Select the right from the list and click “configure”:
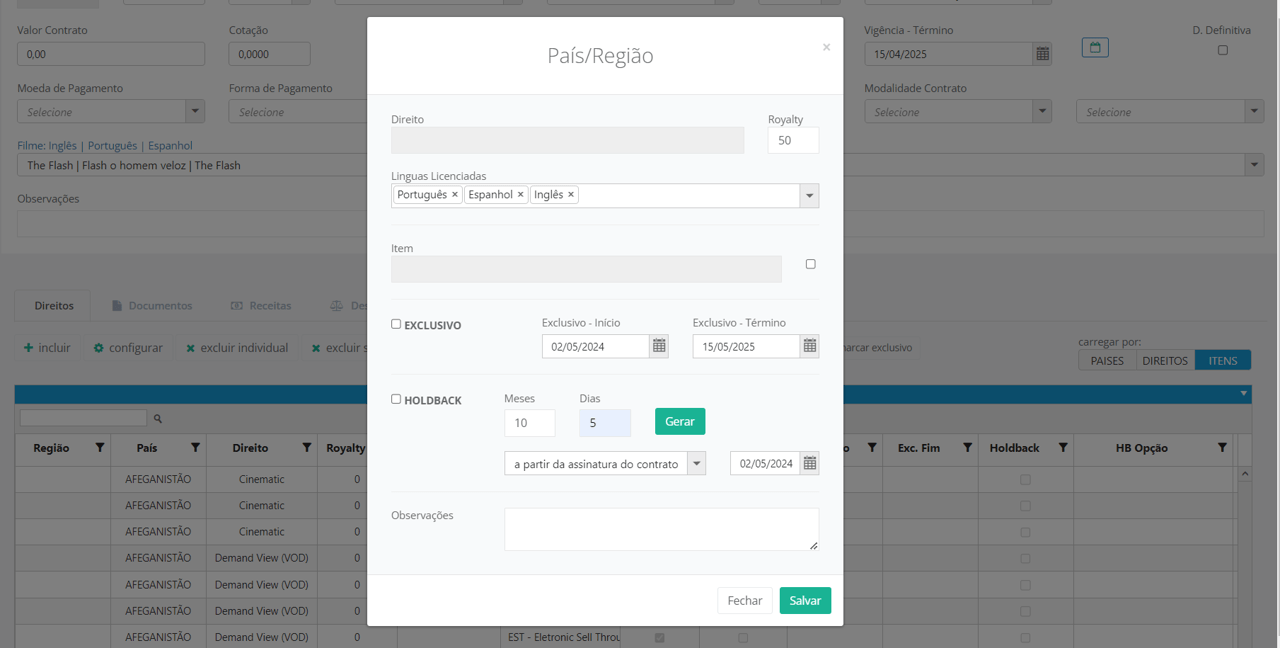
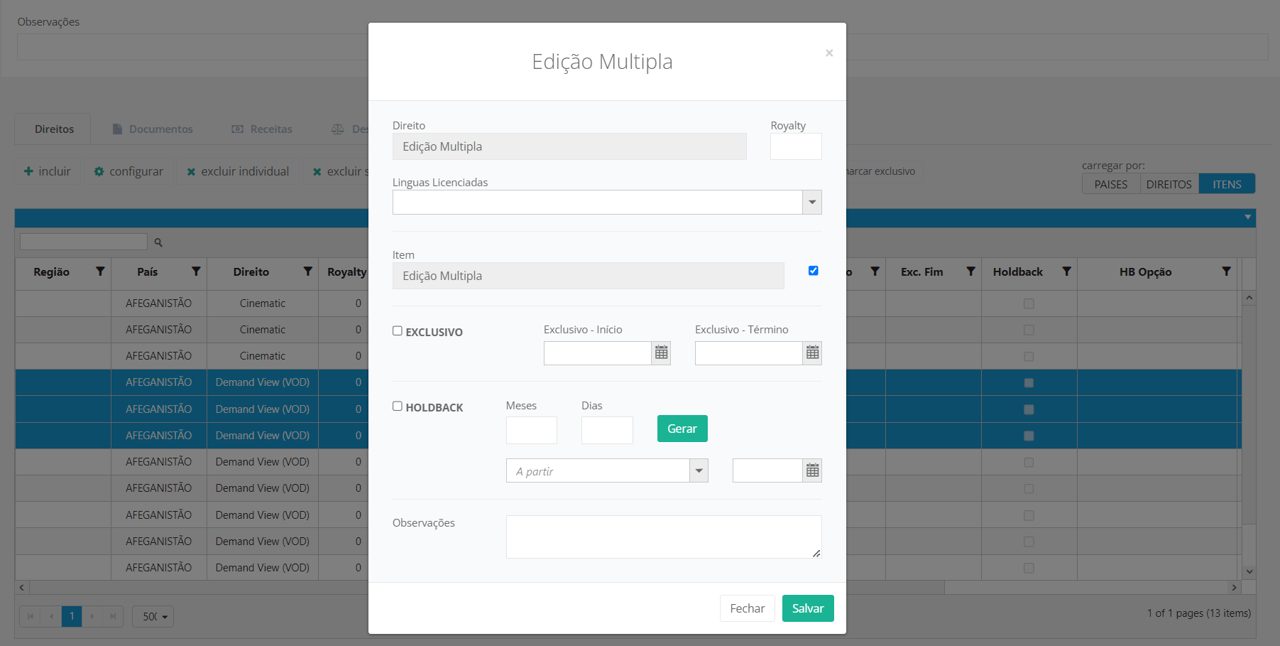
When the pop-up opens, fill in the following fields:
- Royalty:Fill in the Royalties percentage without adding the “%”;
- Licensed languages: Select all licensed languages from the drop-down list. You can select more than one language at a time;
- Exclusive: Check the box if you have acquired an exclusive right. Also enter the exclusivity period in the date fields. To learn more about Exclusivity, click here.
- Holdback: If the item has holdback, select the option. To set the date, there are 2 options:
- Inform the date of entitlement;
- Enter the months and days and select from the options field from which action the holdback will start and click on the “generate” button for the system to calculate the holdback time.
- You can also configure multiple rights at once. To do this, simply select the rights in the list while holding down the CTRL key and then click “configure”. The pop-up will open with the right field filled with the text “Multiple Edit”:
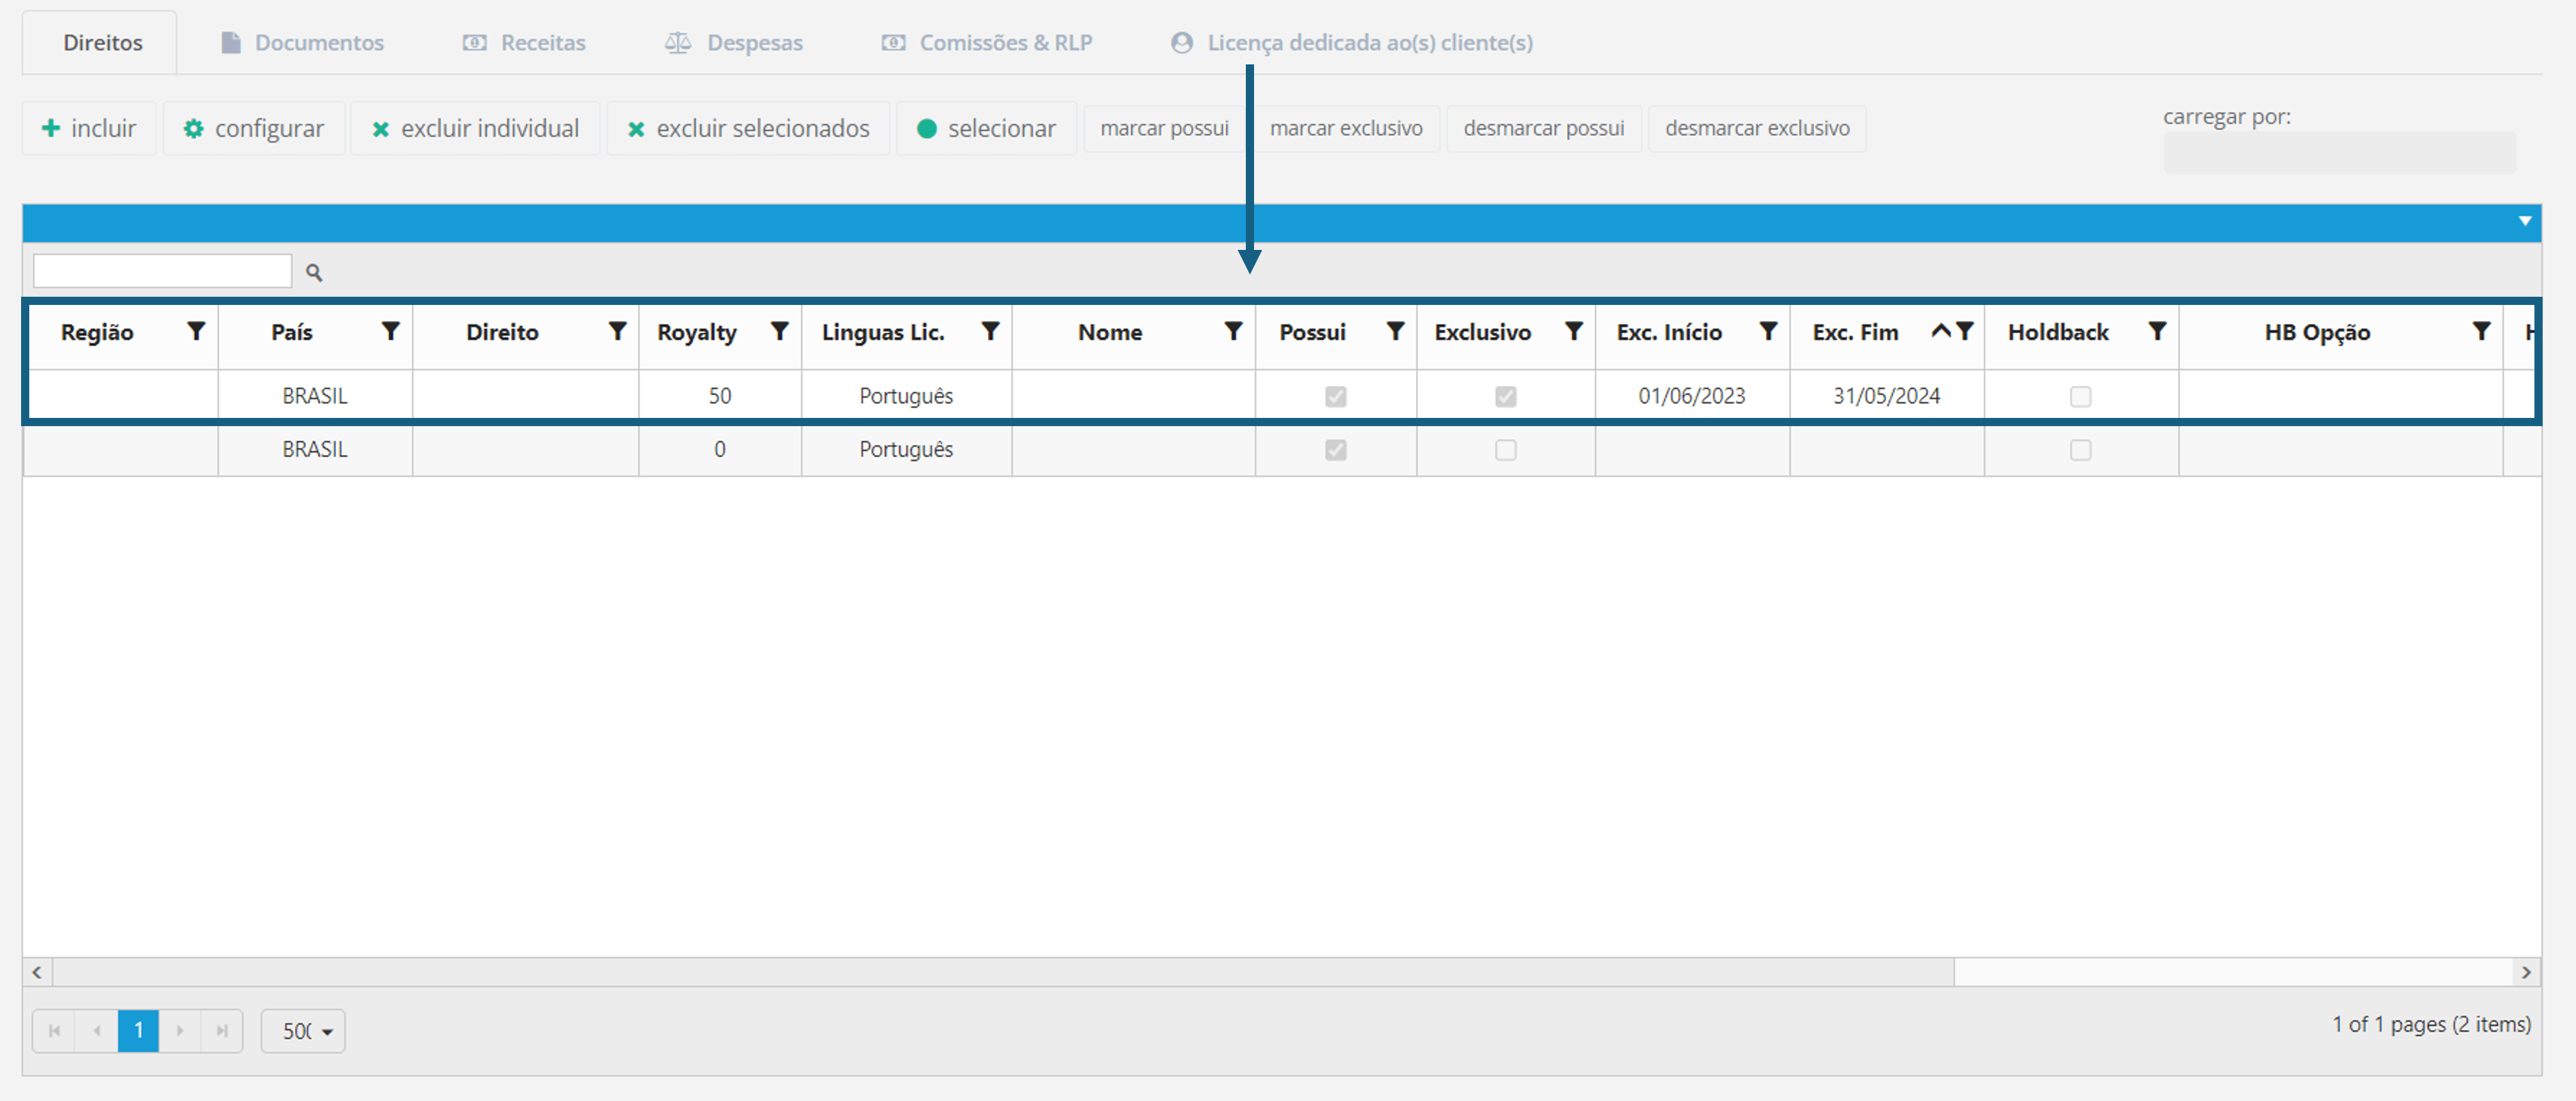
- The configured information will appear in the rights listing table:
- After filling in all the information, click on the “floppy disk” icon to save the License:
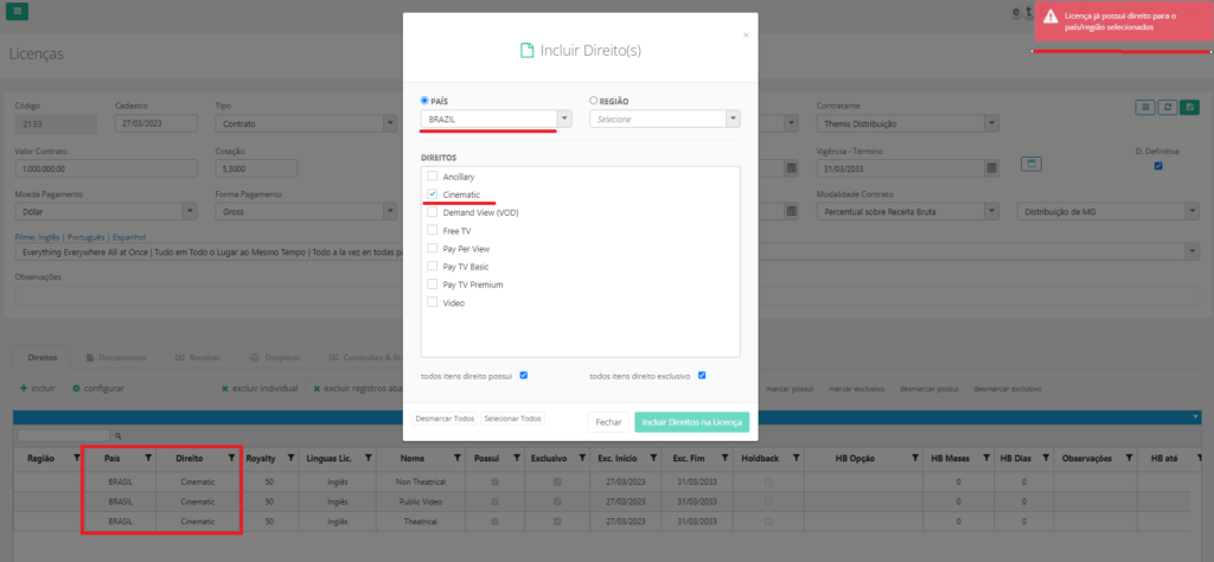
- Blocking message: “License already has entitlement for the selected country/region”. If you see this message when trying to save an Entitlement, check your general list of Entitlements, as it has already been registered:
6. In the tab “documents”, you can upload documents related to the title license, such as the contract. Simply access the tab, click on the upload icon highlighted below and choose the file from your computer.


7. To learn more about tabs Income, Expenses and Commissions & RLP, click here.
8. The License dedicated to client(s) tab can be used to register specific clients, if the License has a rule establishing that it can only be negotiated for specific clients. To do this, simply click on the “+” icon, select the client from the drop-down list and click on the “diskette” icon to save.
Editing Licenses
To edit a License, access the **Licenses** page, double-click on the title or select it and click on "Open Selected":
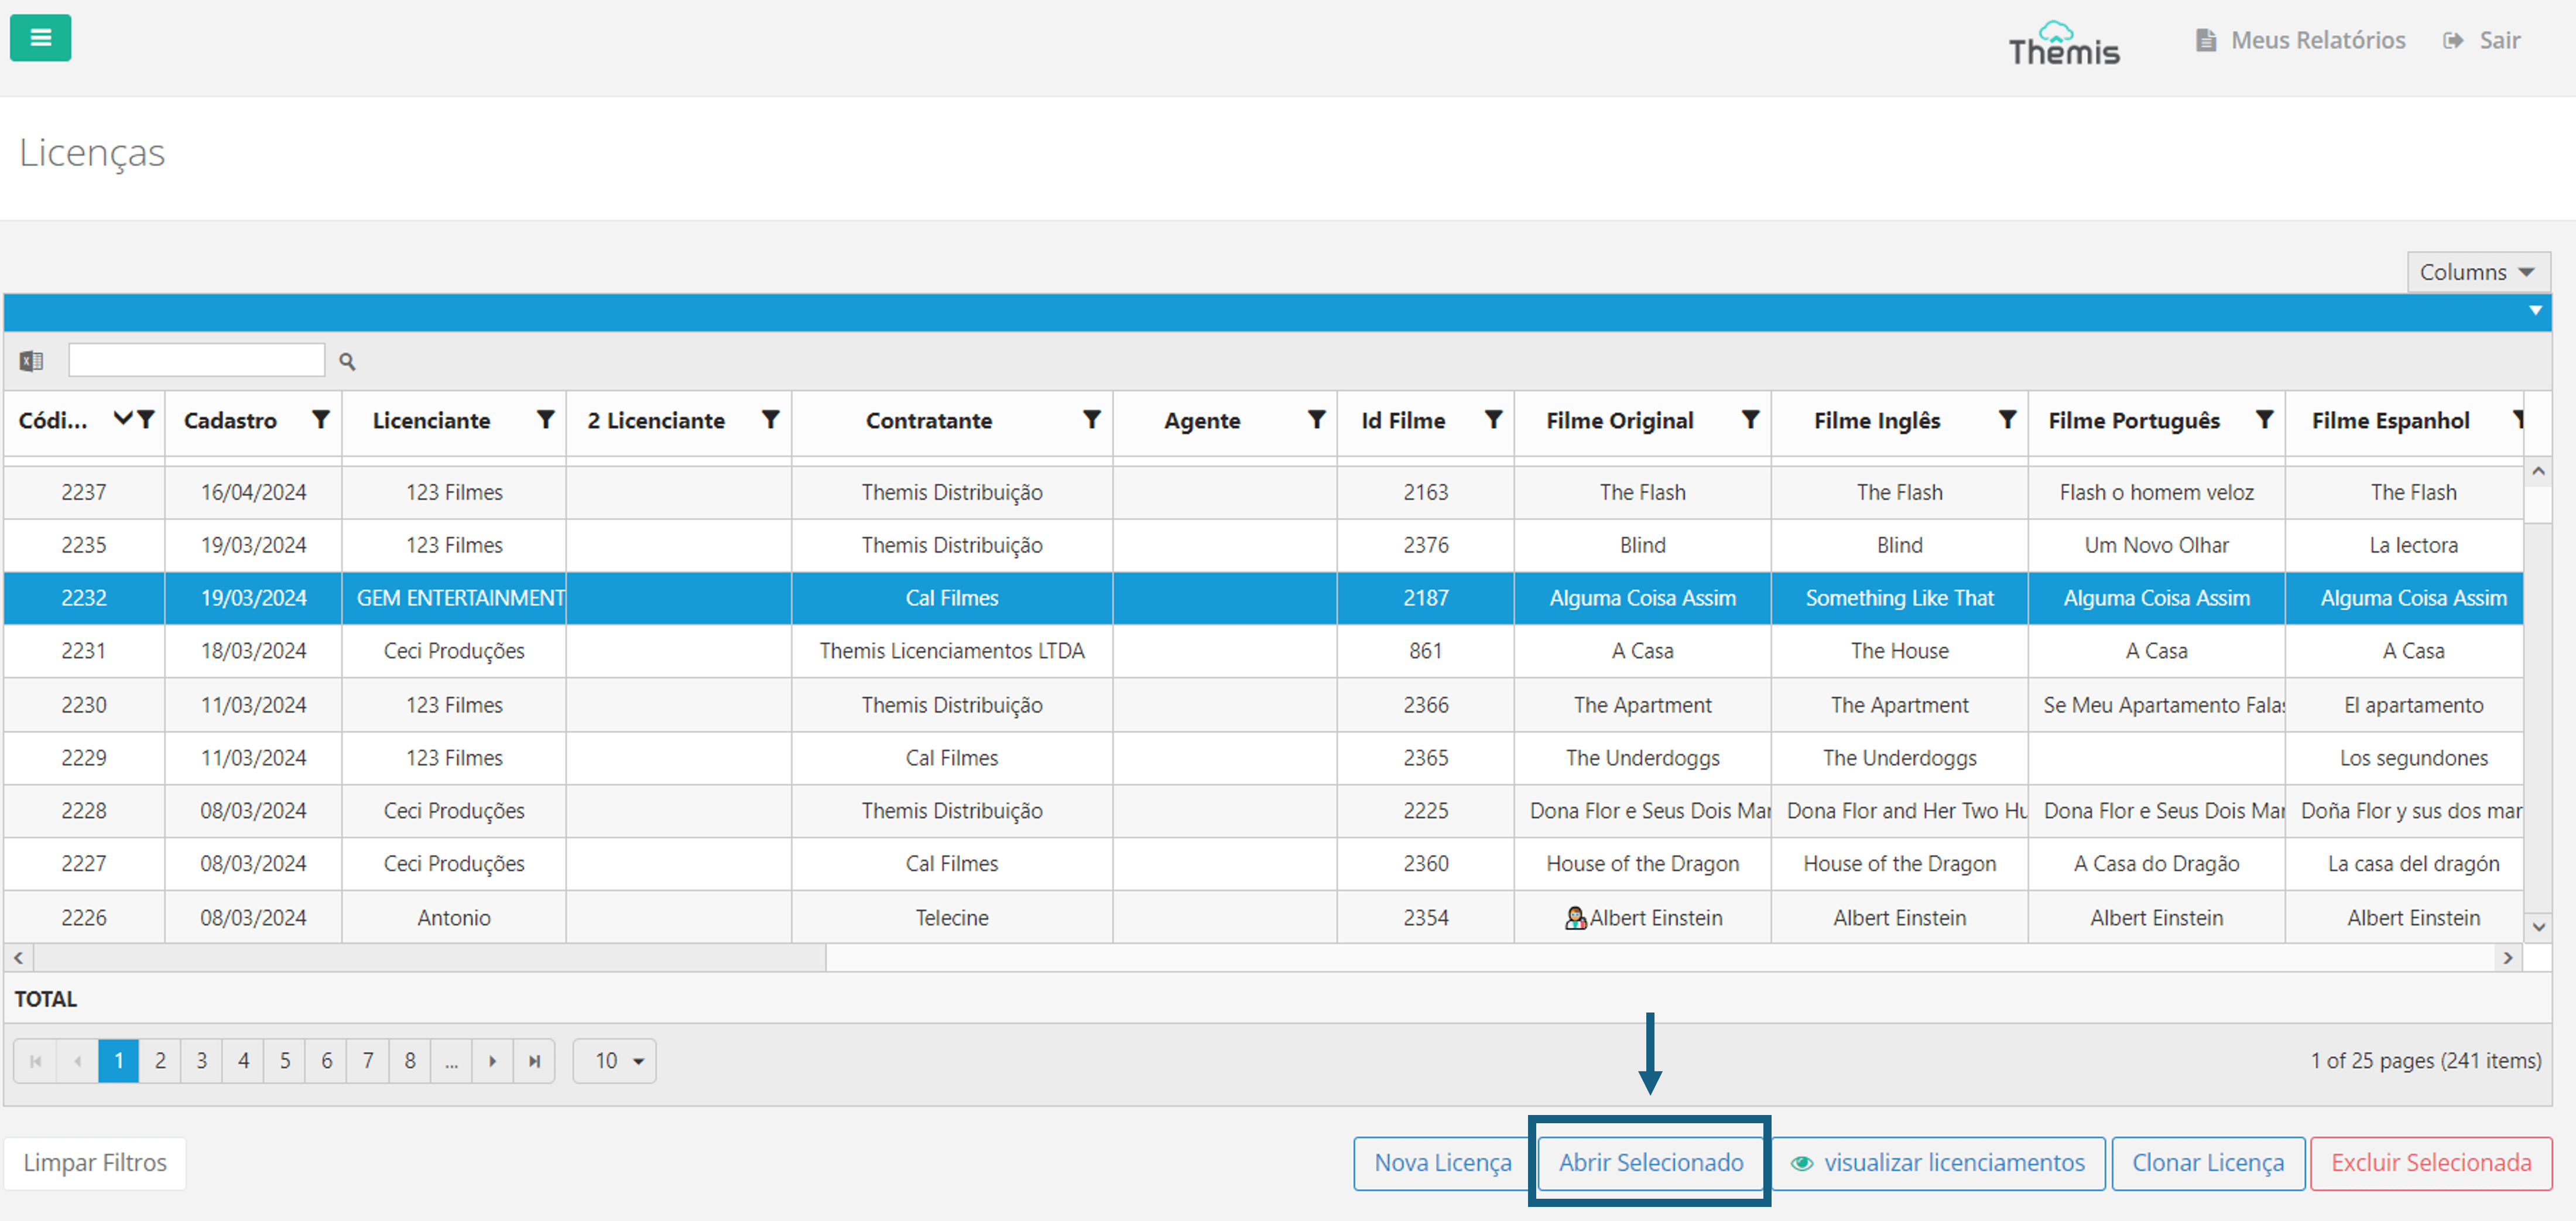
The License editing page will open. Edit the necessary fields and click on the disk icon to save the changes. If you have any doubts on how to fill in each field, refer to Step 3 of the License Registration section in this article.
Cloning Licenses
To expedite the creation of licenses, you can clone an existing License and then edit the specific settings. To do this, select the License you want to clone and click on "Clone License":
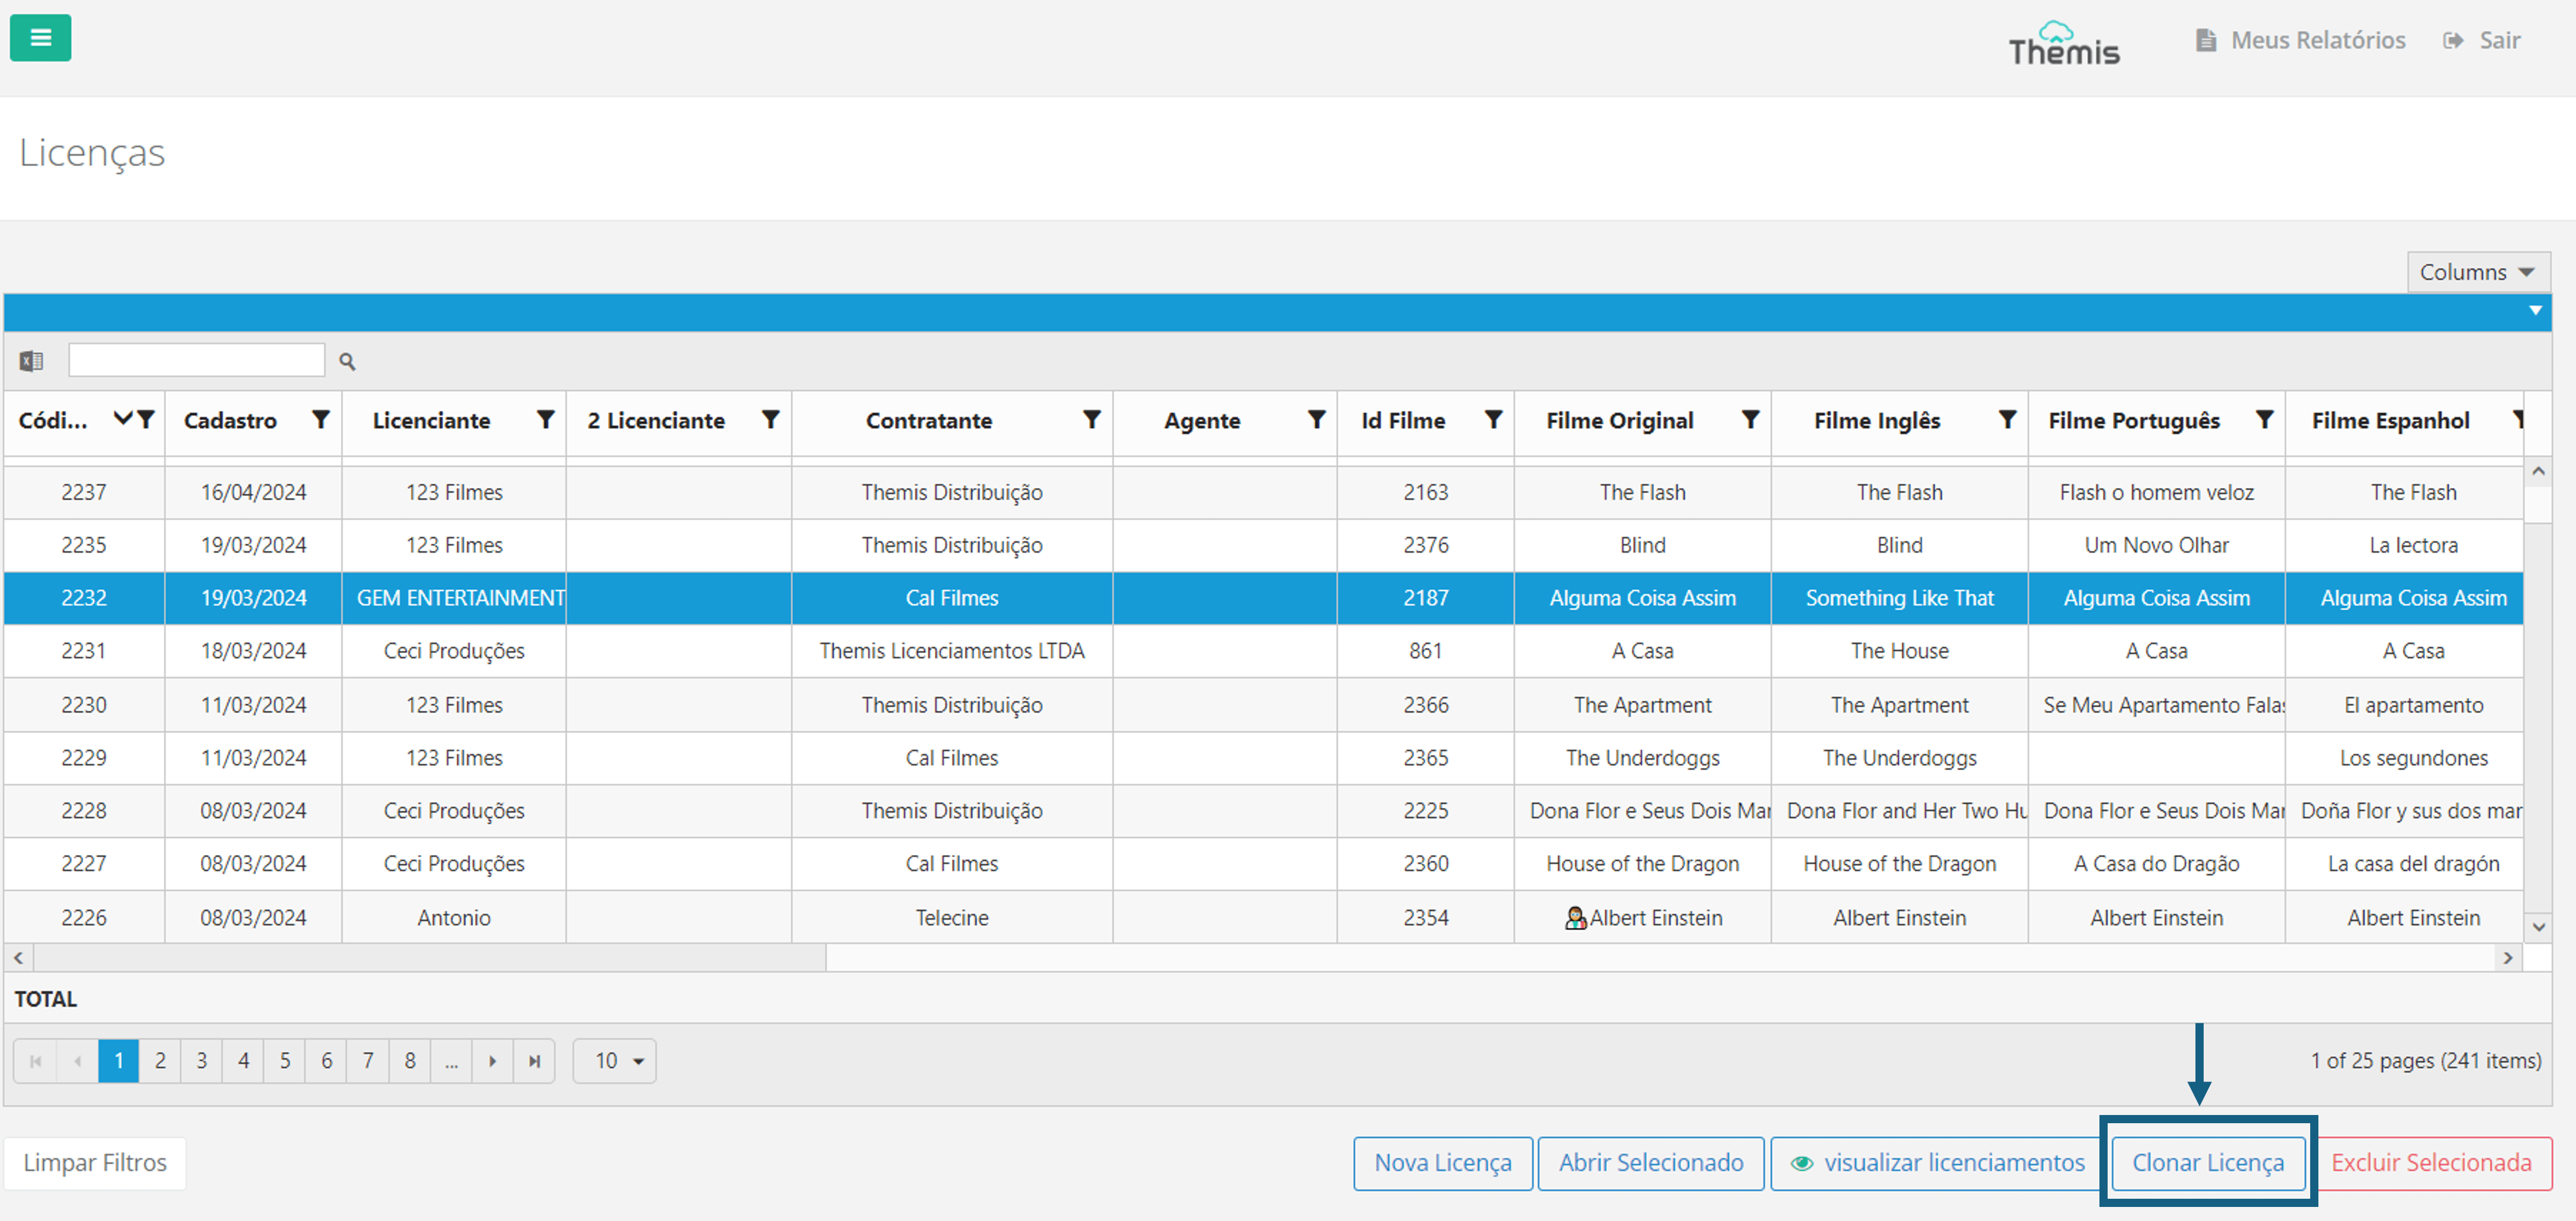
After the pop-up opens, select the title you want to clone and click on "Confirm":

After cloning, the license will have the following attributes of the original License: Licensor, Contractor, Contract value, quote, start date, end date, final date, payment currency, payment method, contract signature, NOD, contract modality, Observations, rights and documents. In other words, the cloned license copies common contractual information. On the other hand, the following attributes are not copied: licensor, agent, tabs: income and expenses, commission and dedicated license. If it is necessary to edit any attribute, see above in the section License Registration how to edit the fields.
Deleting Licenses
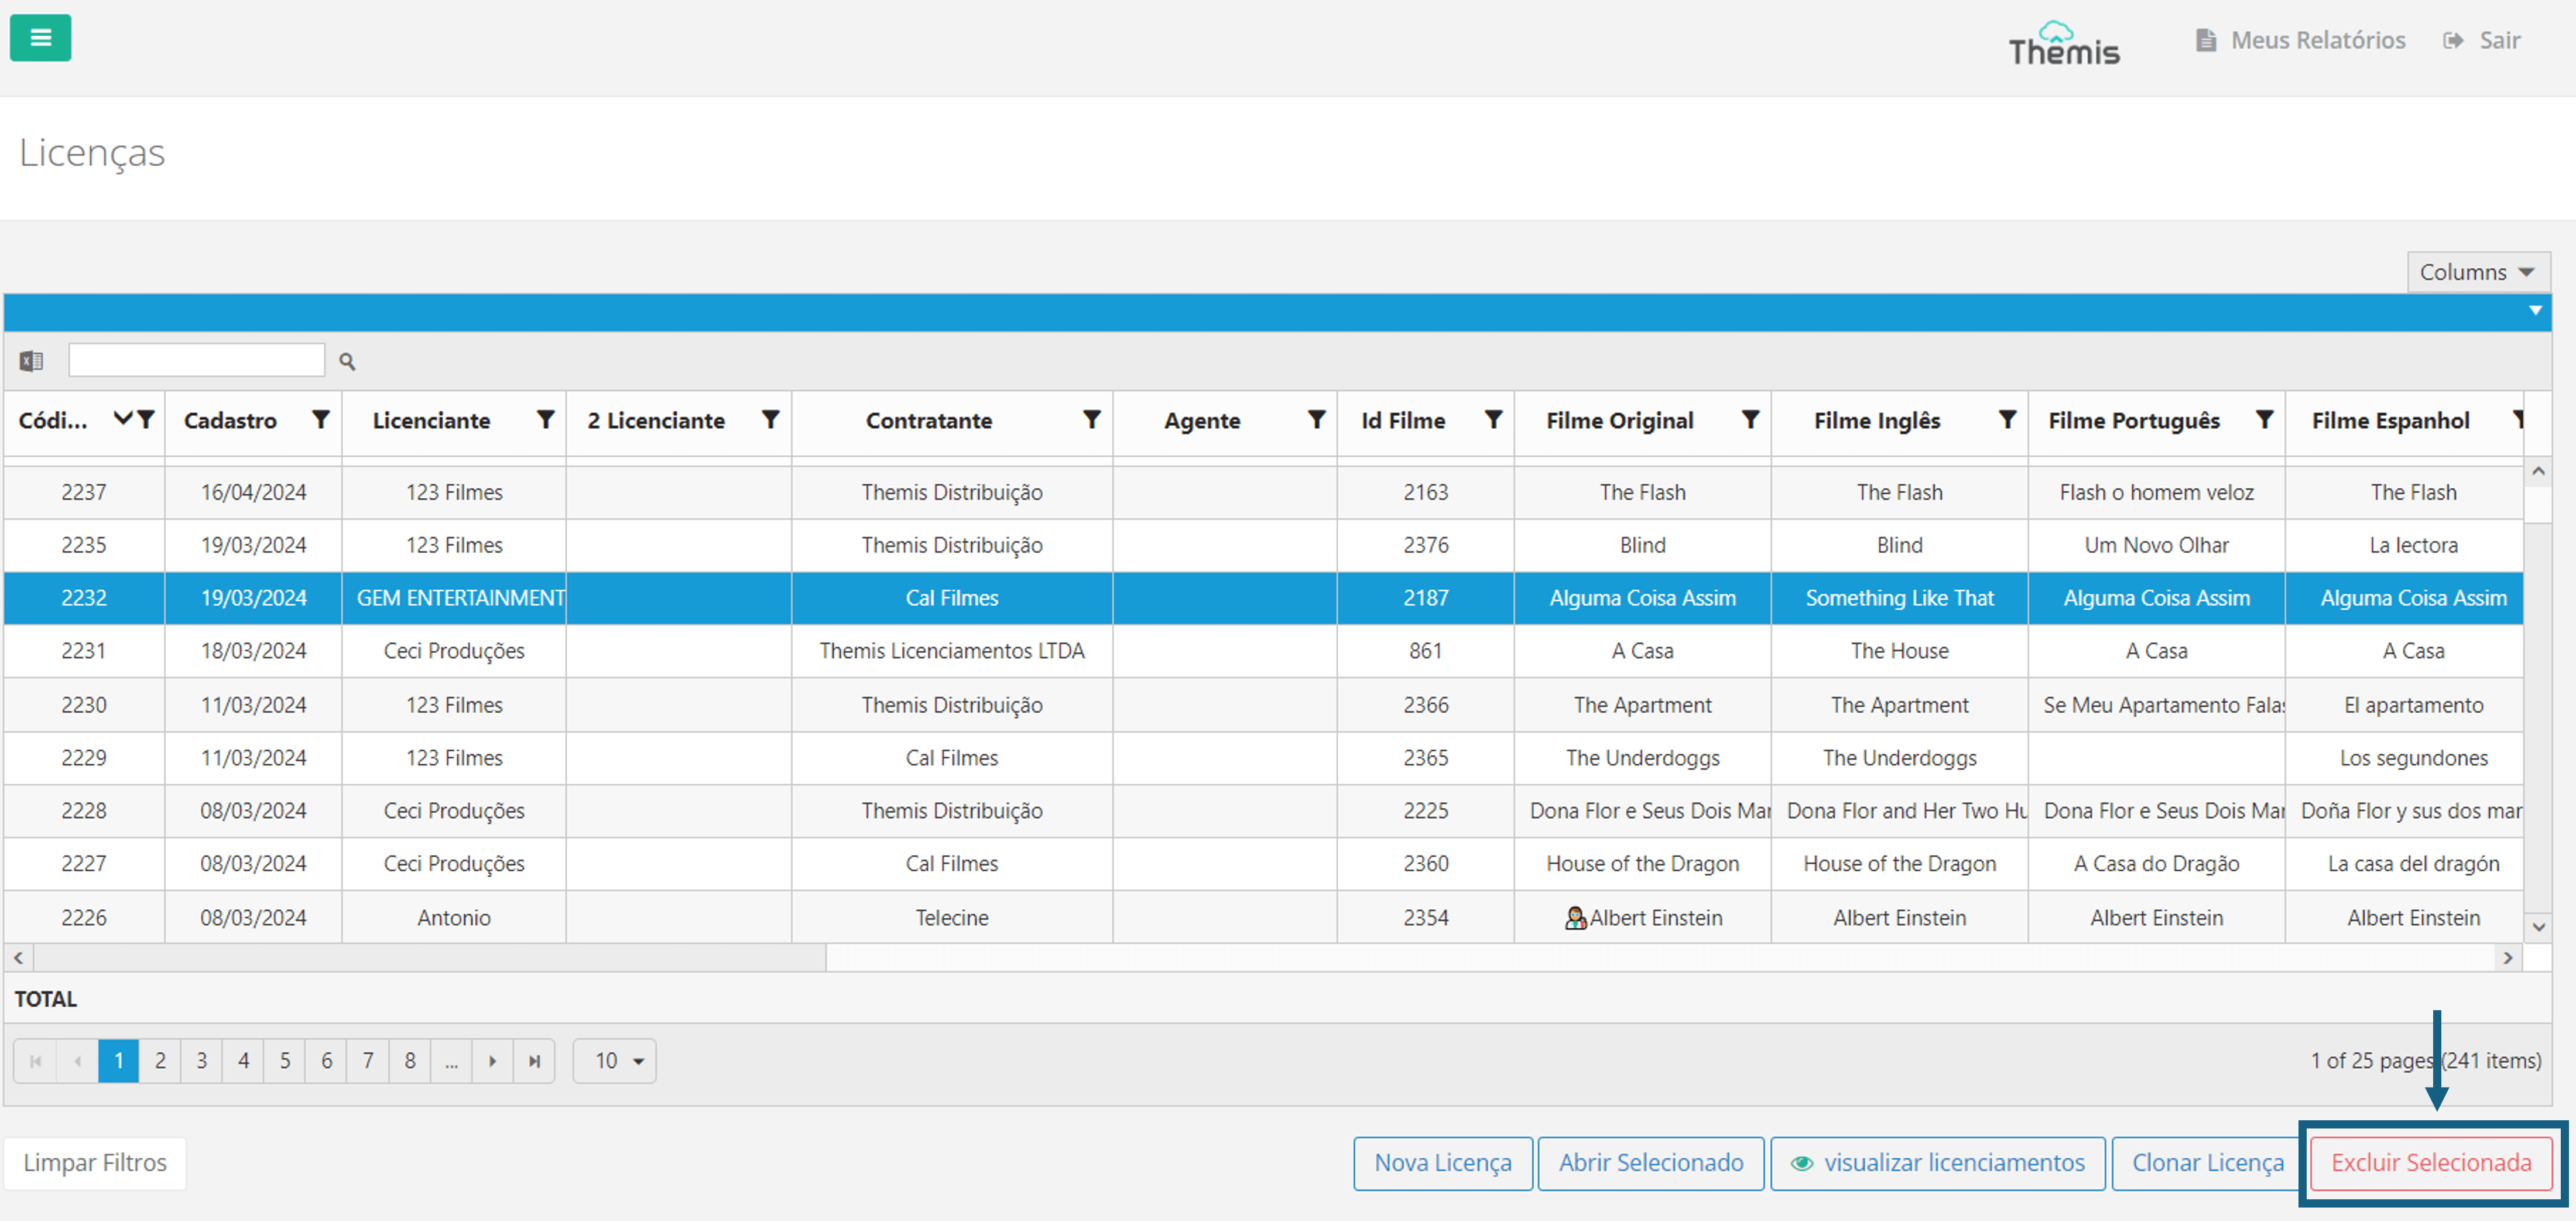
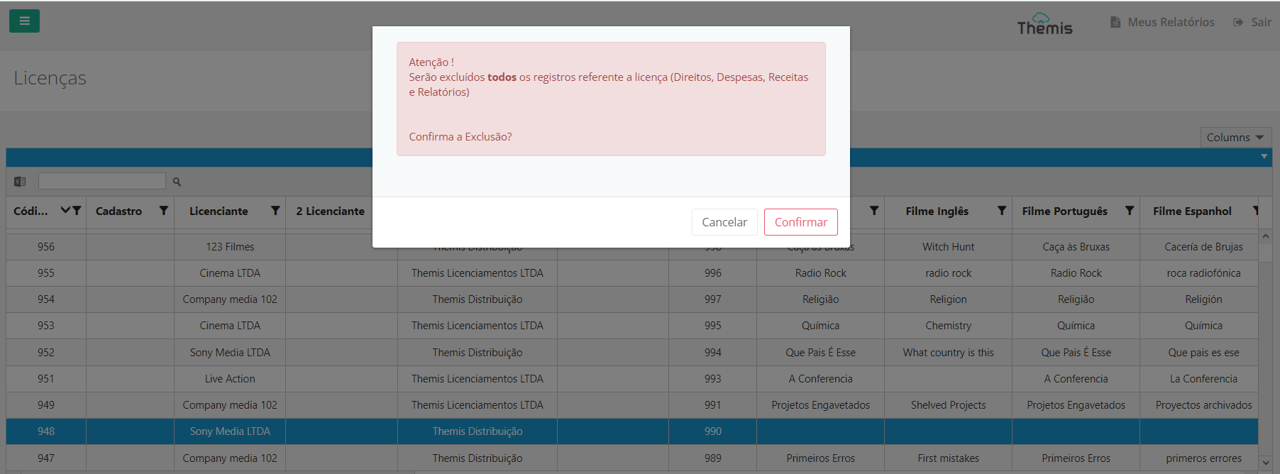
To delete a License, select the License, click on "Delete Selected," and confirm the action in the pop-up that will appear:
Note If your profile does not have this functionality, you may not have access to delete items due to profile restrictions. If you need to change the User's profile type, click here and find out more.
