Creating and Editing Rights
Menu→Database Registration→Rights
In this article, you will have access to information on:
To consult the registration, editing and export of the list of rights on the platform, access the Rights in menu Database Registration.
When accessing the page, you will see the list of registered rights:

Register a right
1. To register a right, simply click on the “new right” button, located in the bottom right corner of the page:

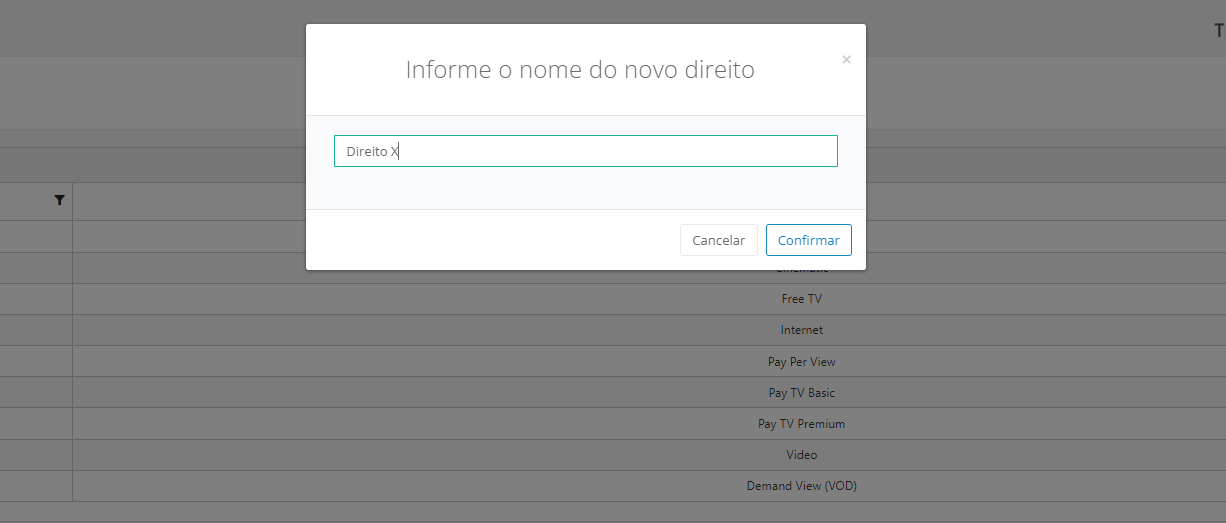
2. When the pop-up opens, fill in the name of the right and click “Confirm”:
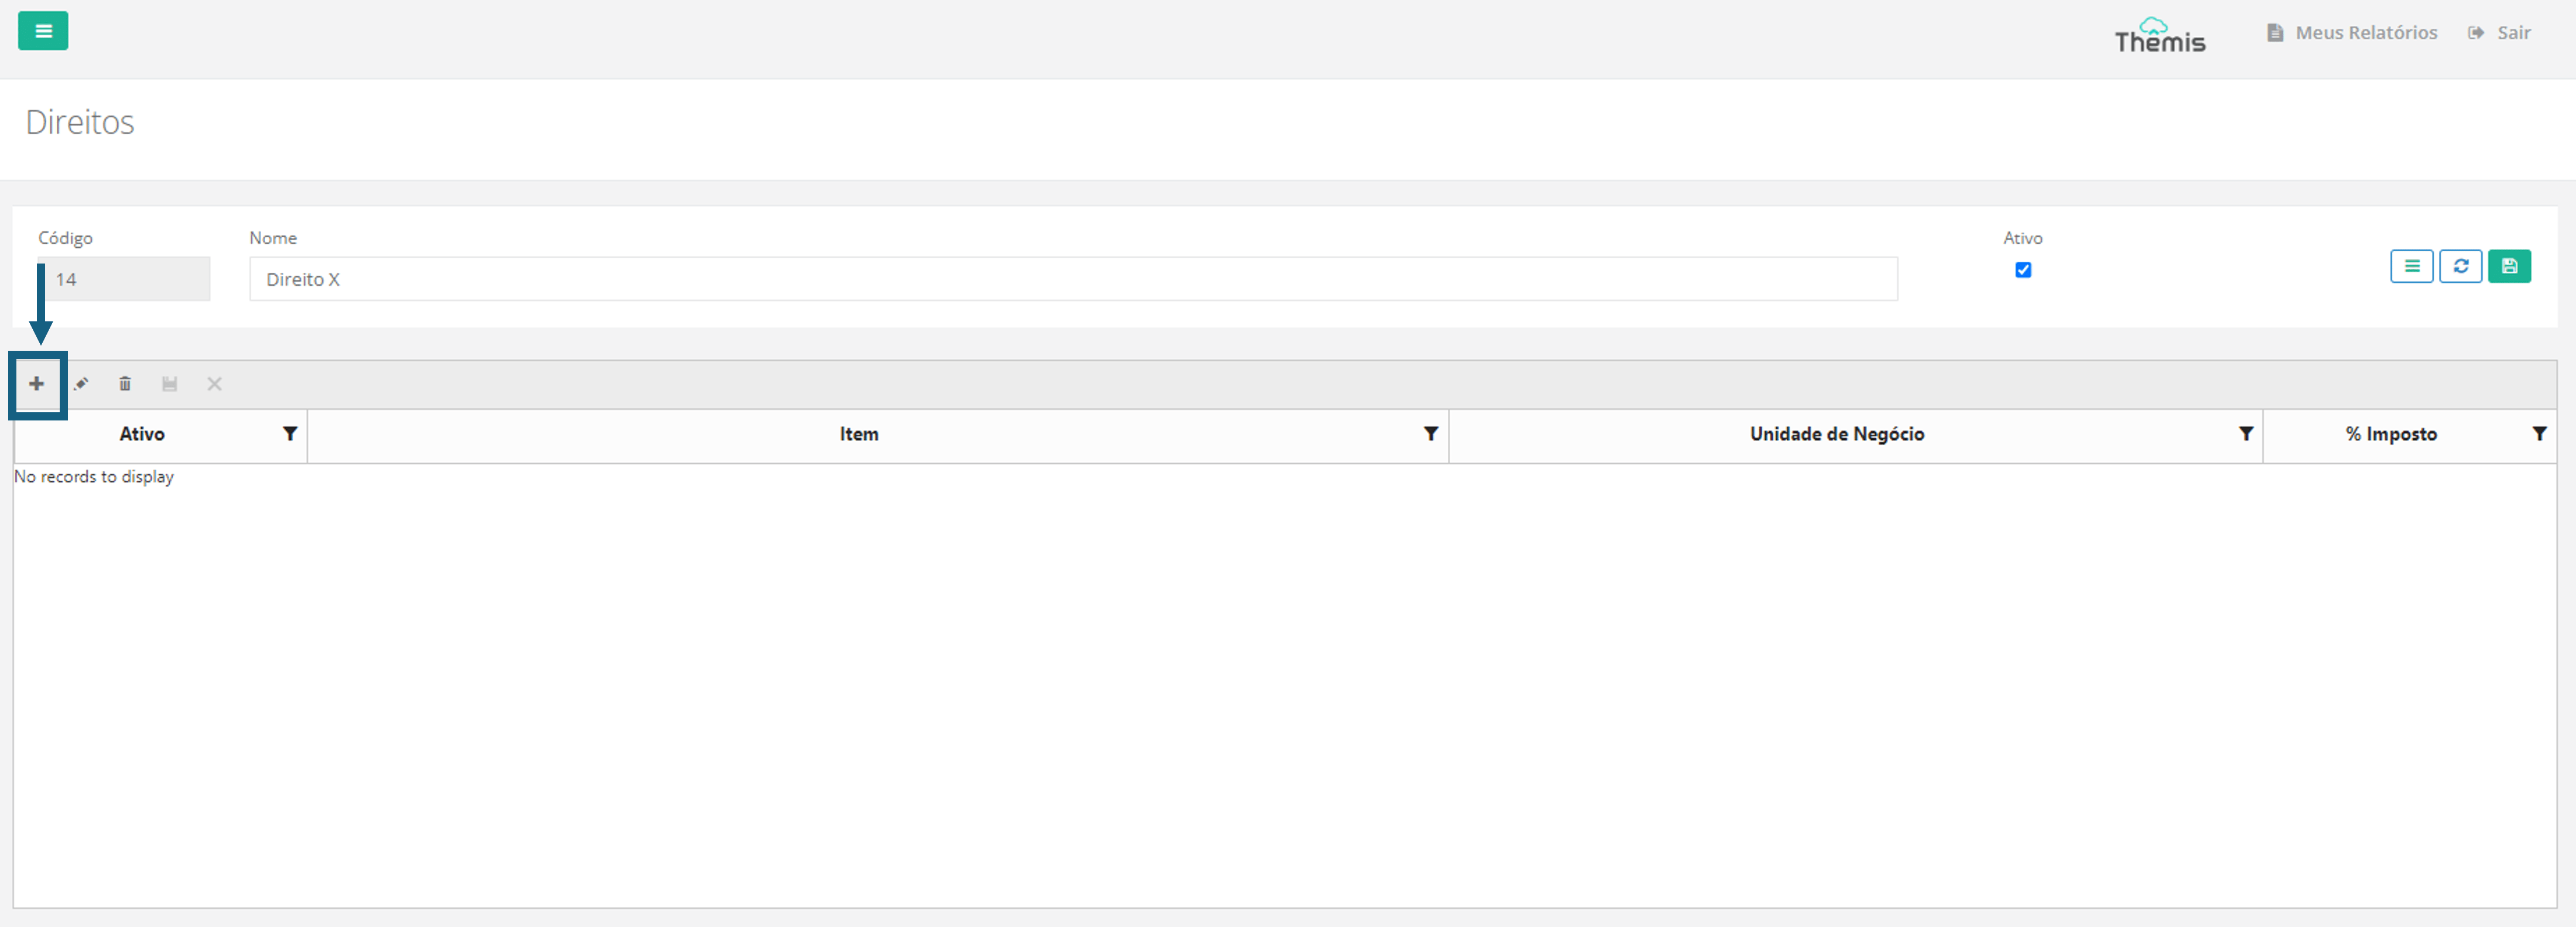
3. When you access the right screen, you will see the following fields at the top:
- Code: Automatically filled by the system and cannot be edited.
- Name: Confirm the name of the right;
- Active: The checkbox is already checked when registering a new right. If you wish to deactivate the right, uncheck the box.
4. At the bottom of the page, you must register all the items of the right is being created. Click the “+” icon to add a new item:
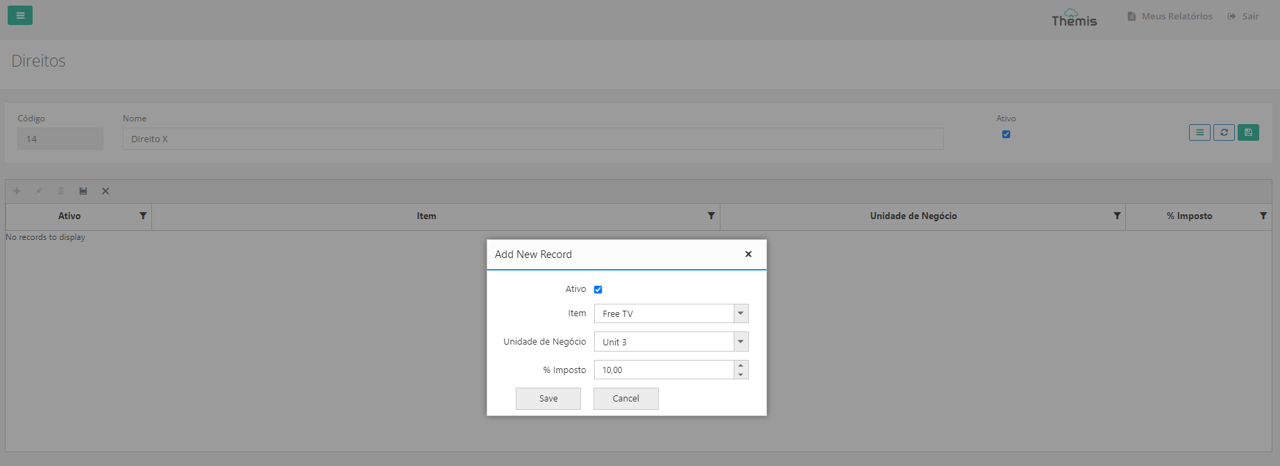
5. In the pop-up that will open, choose the item and the Business Units in the drop-down list. Indicate the percentage of tax. The “active” checkbox is already checked by default. Uncheck it if you want to disable an item. After filling in the data, click “save”:
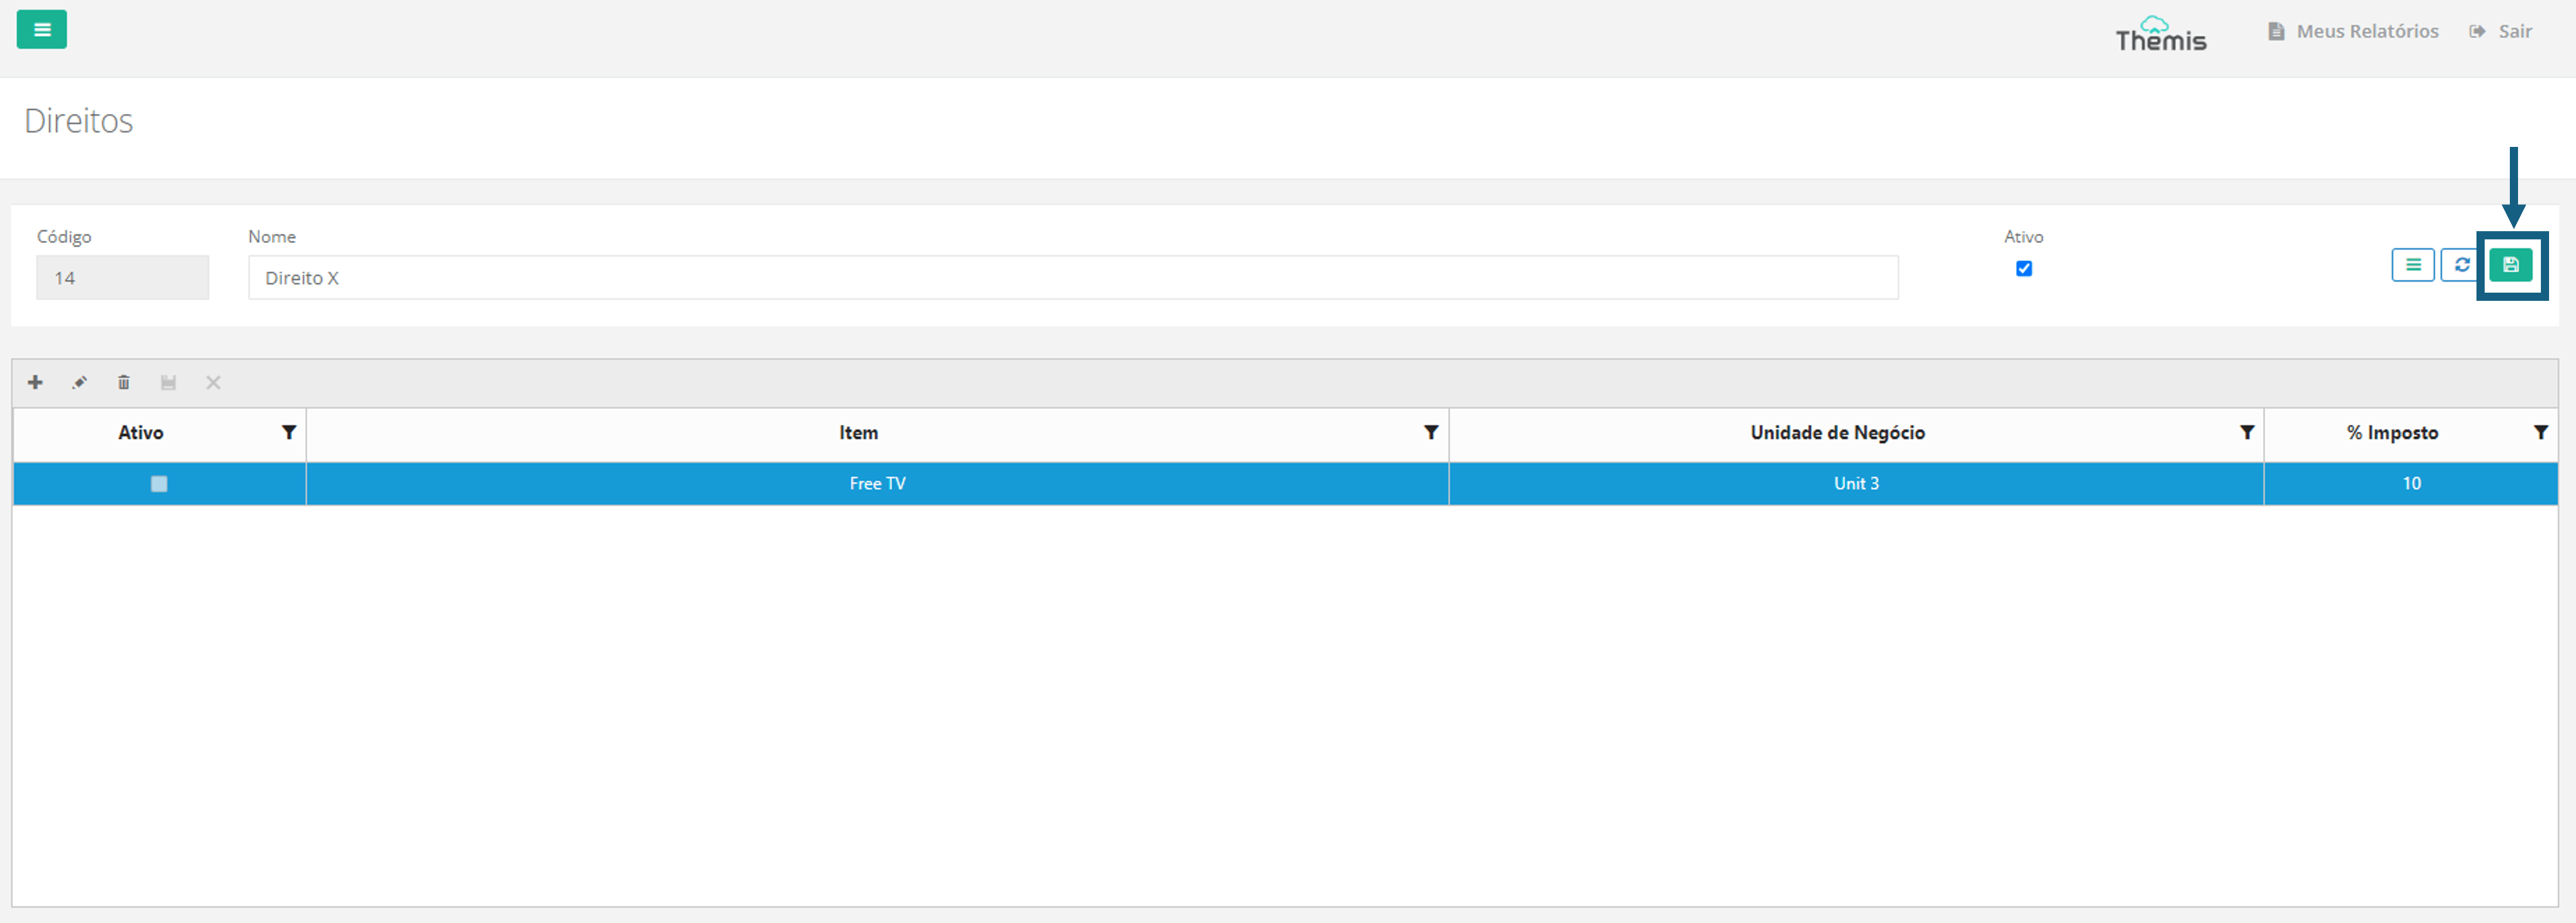
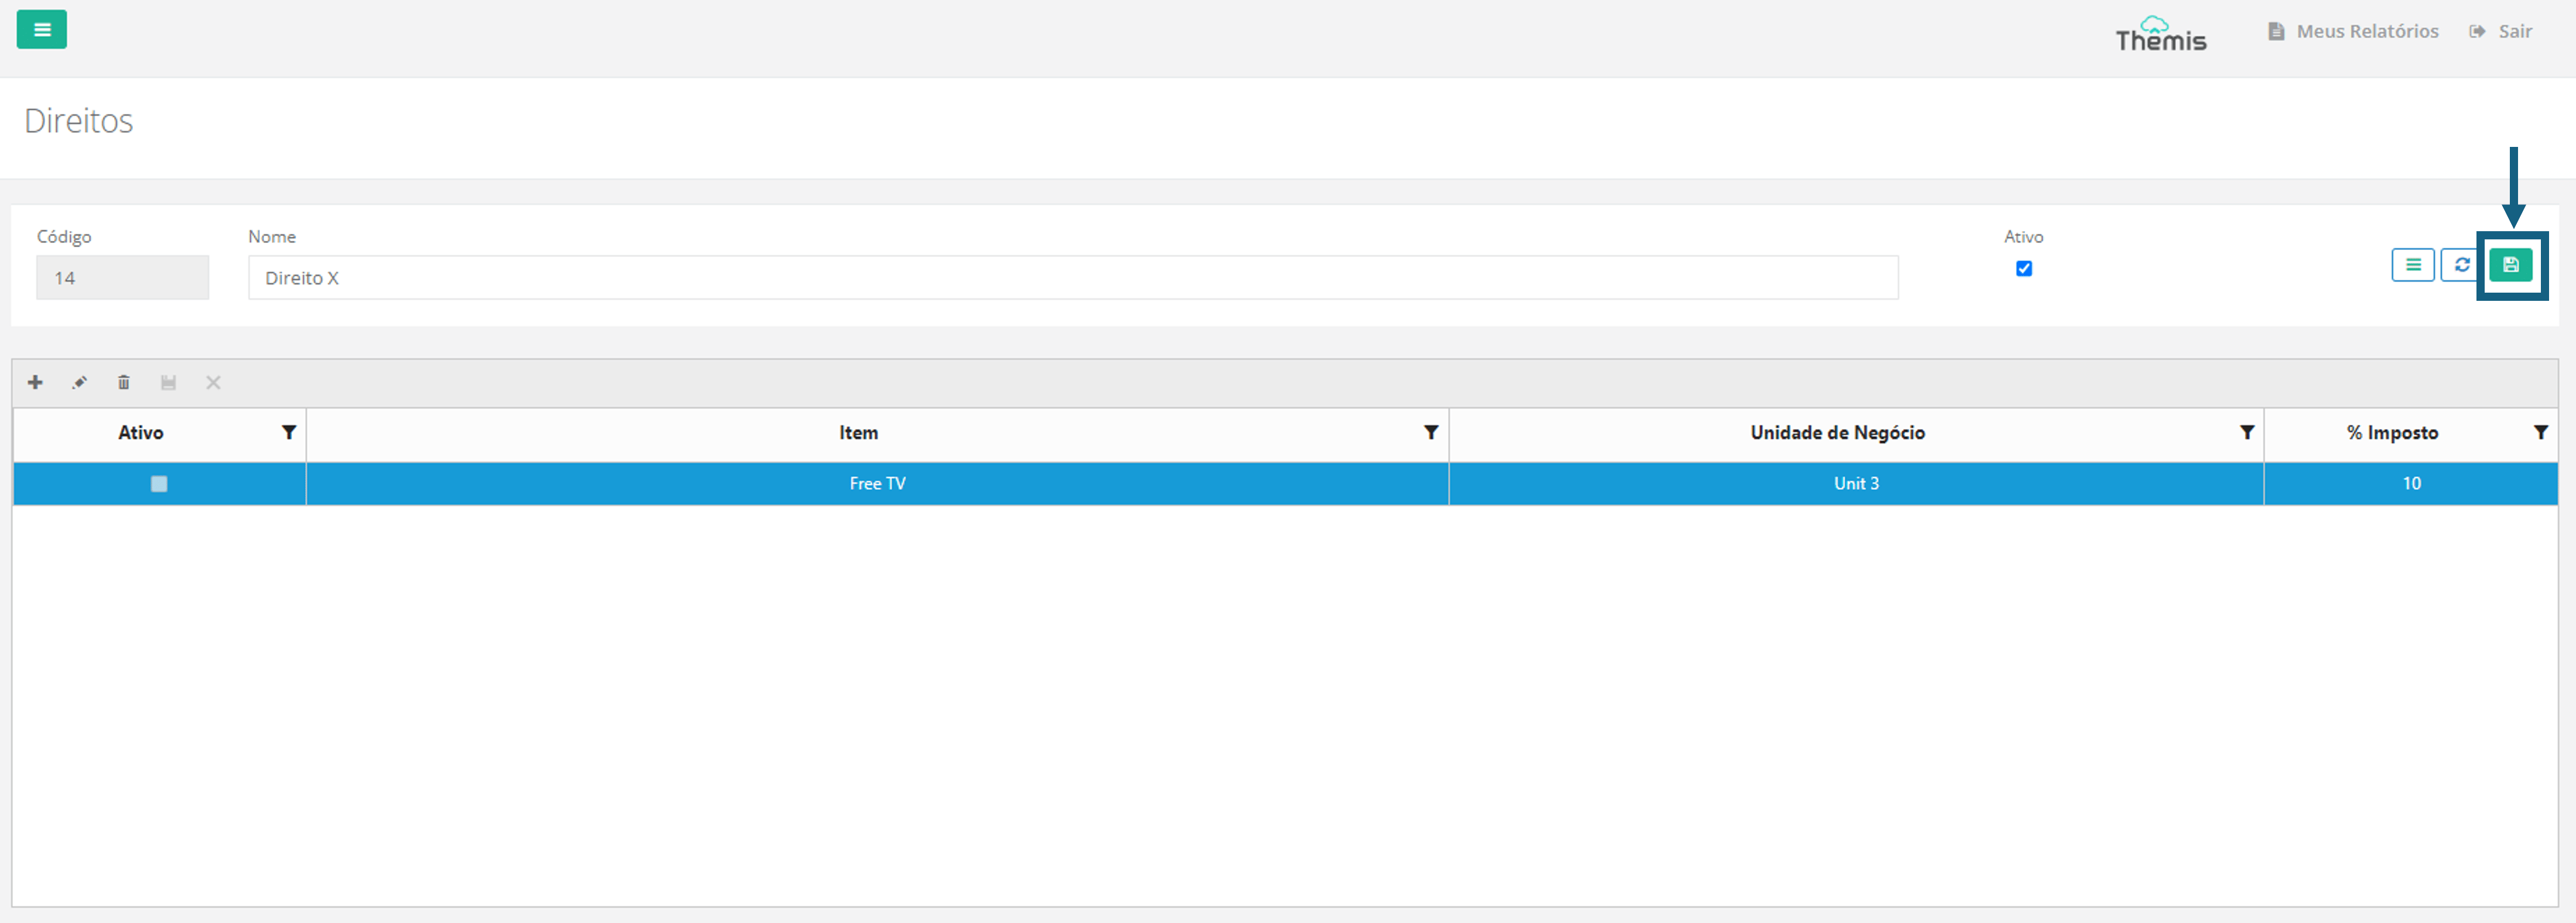
6. After filling in the data and including all the items of the right, click on the floppy disk icon to save the changes:
Edit a right
1. Double-click on the right name to open the editing screen or select the right and click “open selected”:

2. When you access the rights screen, you will be able to edit the following fields:
- Name: Name of the right;
- Active: If you want to disable the right, uncheck the box.
3. You can also edit the list of entitlement items that are registered under that entitlement.
- To include a new right item, click the “+” icon and the information through the pop-up that will open. See more in item 4 of the section rights registry above.
- To edit a right item, select the item and click the “pencil” icon. Edit the information and save the change
- To delete a right item, select the item and click the “trash can” icon. Confirm the action in the pop-up that will open.
4. After making your edits, click the floppy disk icon to save the change:
Delete a right
1. To delete a right, simply select the right and click the “Delete” button:

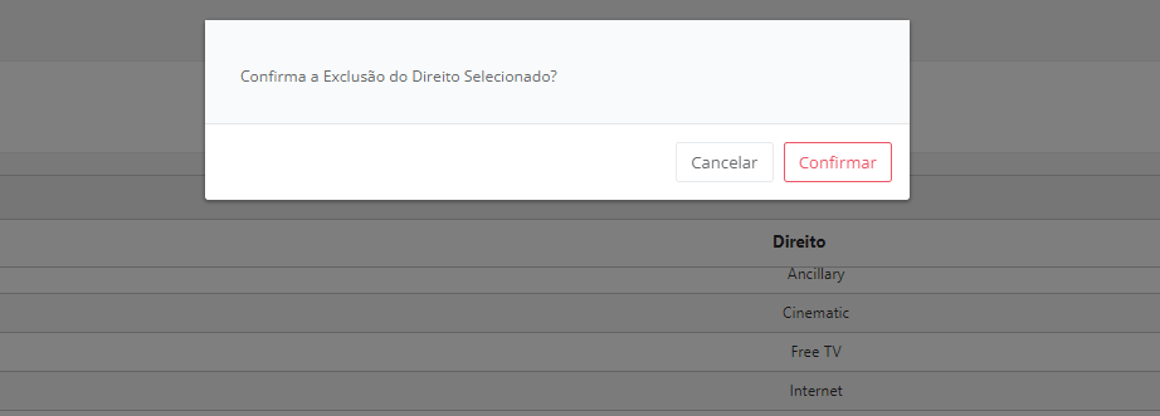
2. Then confirm the deletion in the pop-up that will appear:
Exporting Rights List – Excel
To export the list of rights in Excel format, simply access the rights home page and click on the Excel icon located in the top left corner of the screen. The download will start automatically:

